Getting started
Connect to the system
The software of the CMTK is browser-based. You connect to the system using your web browser (Google Chrome, Firefox, MS Edge). An additional installation of software is not required.
- Open your web browser. There you have the following options:
For direct connection via LAN port 1 enter192.168.10.1in the address line.
For connection via LAN port 2 (integration in existing network infrastructure) you reach the system via the IP address assigned by your DHCP server or http://cmtk.
The following dialog appears:

-
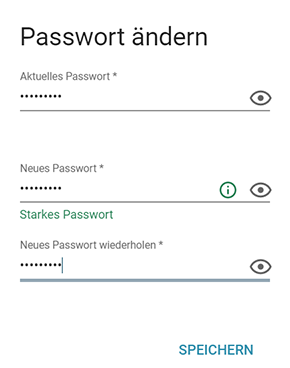
Log in with the user name
adminand the initial password found on the nameplate. When logging in for the first time, the password is as follows:User Initial password admin CMTK-adm1n You will be prompted to change the password.
Note
You can change the data again later in the user management, see Manage users.
-
Change the password and click Save.
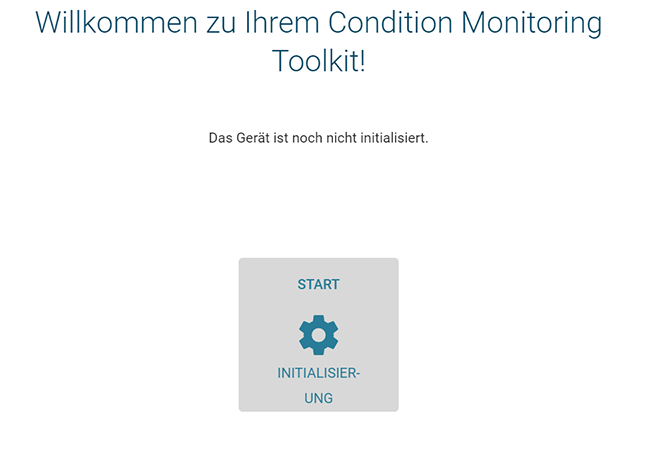
Initialization
During the initial commissioning of the system, you must configure essential basic settings. You can adjust these settings again later in the settings section.
-
Click START INITIALIZATION to start the initial configuration and follow the further instructions.
The connected sensors are displayed.
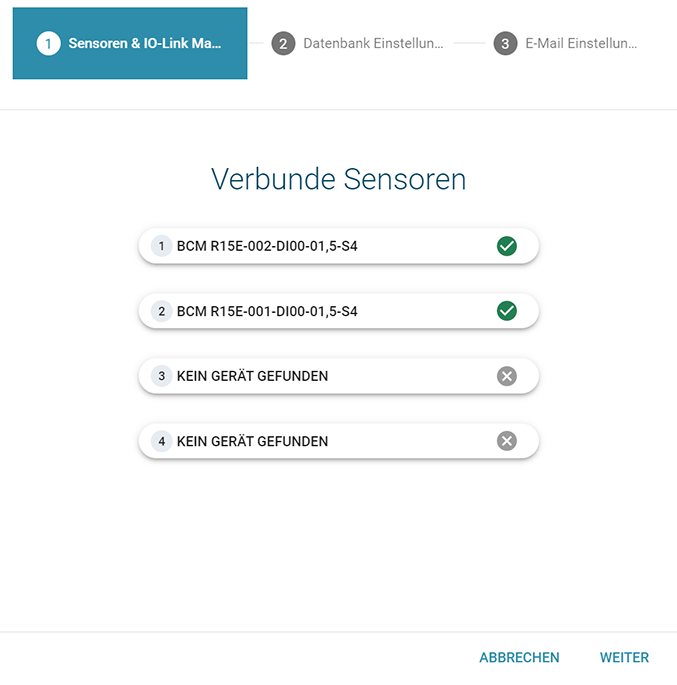
If the CMTK already knows the IODD of the IO-Link device, this is indicated by a green check mark on the port. Unknown IO-Link devices are indicated by a red cross. The IODD can be uploaded for these IO-Link devices.
Note
For unknown sensors you can download the necessary IODDs from the manufacturer or at https://ioddfinder.io-link.com/.
-
Click NEXT.
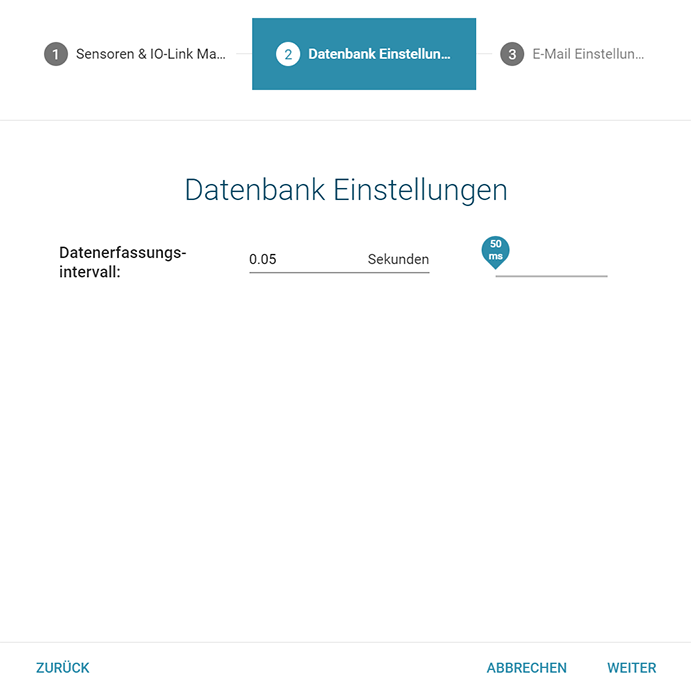
The following dialog is displayed:
-
Here you specify the data rate at which the data for the connected sensors are stored in the database. The data rate can be set between 50 ms and 60 s.
Note
The data retention time on the system depends directly on the data rate and the sensors connected in each case. With a data rate of 50 ms and 4 connected sensors, you can assume a retention time of 2 weeks under normal circumstances.
-
Click NEXT.
The following dialog is displayed:
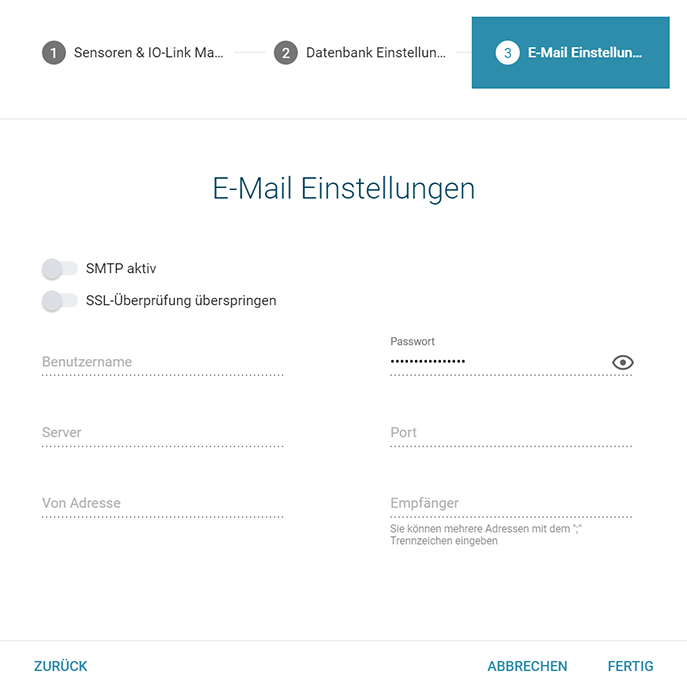
-
Here you make the e-mail settings. The system can send notifications by e-mail. To send e-mail notifications, the system requires a connection to the Internet or to a corresponding SMTP server (contact the IT administrator if necessary). You can also skip the e-mail settings and set them up later.
-
When you finish with all the settings, click DONE.
The initial setup of the system is now complete and the program starts with the user interface.
User interface
After successful login, the overview page is displayed.
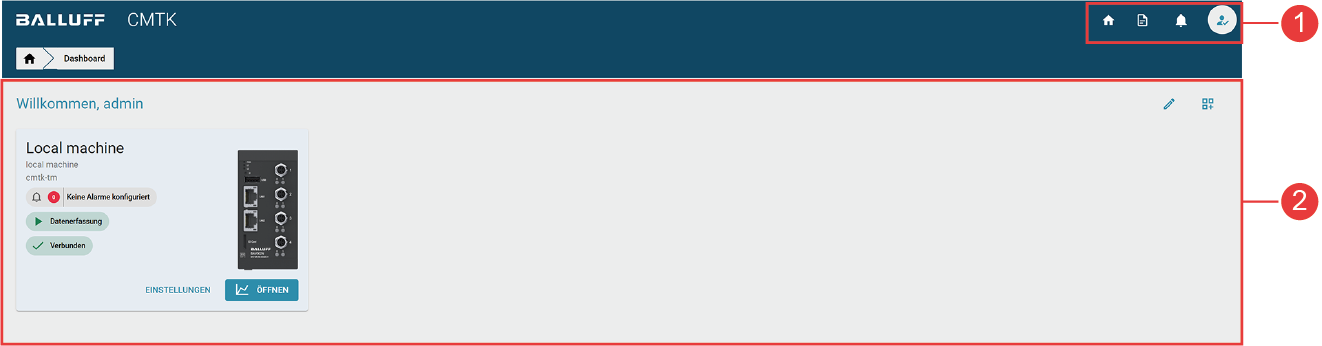
| Pos. | Description |
|---|---|
| 1 | Toolbar |
| 2 | Work surface with tiles |
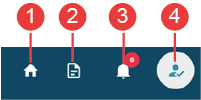
Toolbar
Via the toolbar you can directly access the corresponding functions (Home, Logfile, Notifications). The user menu icon takes you to a role-dependent menu with user functions (Change language, Help, User management, Logout). Click Home to return to the overview page.
| Pos. | Description |
|---|---|
| 1 | Home - Takes you back to the overview page. |
| 2 | Logfile - Opens the log file. |
| 3 | Notifications - Shows the notifications of the system. |
| 4 | User menu - Opens the user menu with the functions Change language, Help, User management, Logout. |
Work surface with tiles
Within the workspace, the systems are displayed in the form of tiles. Each tile represents a system and displays information about the system states. Click on the tile to reach the graphical user interface. Click SETTINGS to access the general settings for the system. Click OPEN to open the data visualization, see Visualize data.
Important basic settings after commissioning
During initial commissioning, you should check the menu items Time setting, Network settings and Sensors & IO-Link master in particular to ensure that they are correct. See Set system time, Set network, Set sensors and IO-Link master.