Display multiple CMTKs
Add CMTKs to the overview page
You can add further CMTKs as so-called nodes on the overview page of a CMTK (primary CMTK). You will then also be shown the node CMTKs via the IP address or host name of the primary CMTK, and can display their data visualizations or open their settings page.
Note
To set up the function, you must be logged in as a user with admin rights.
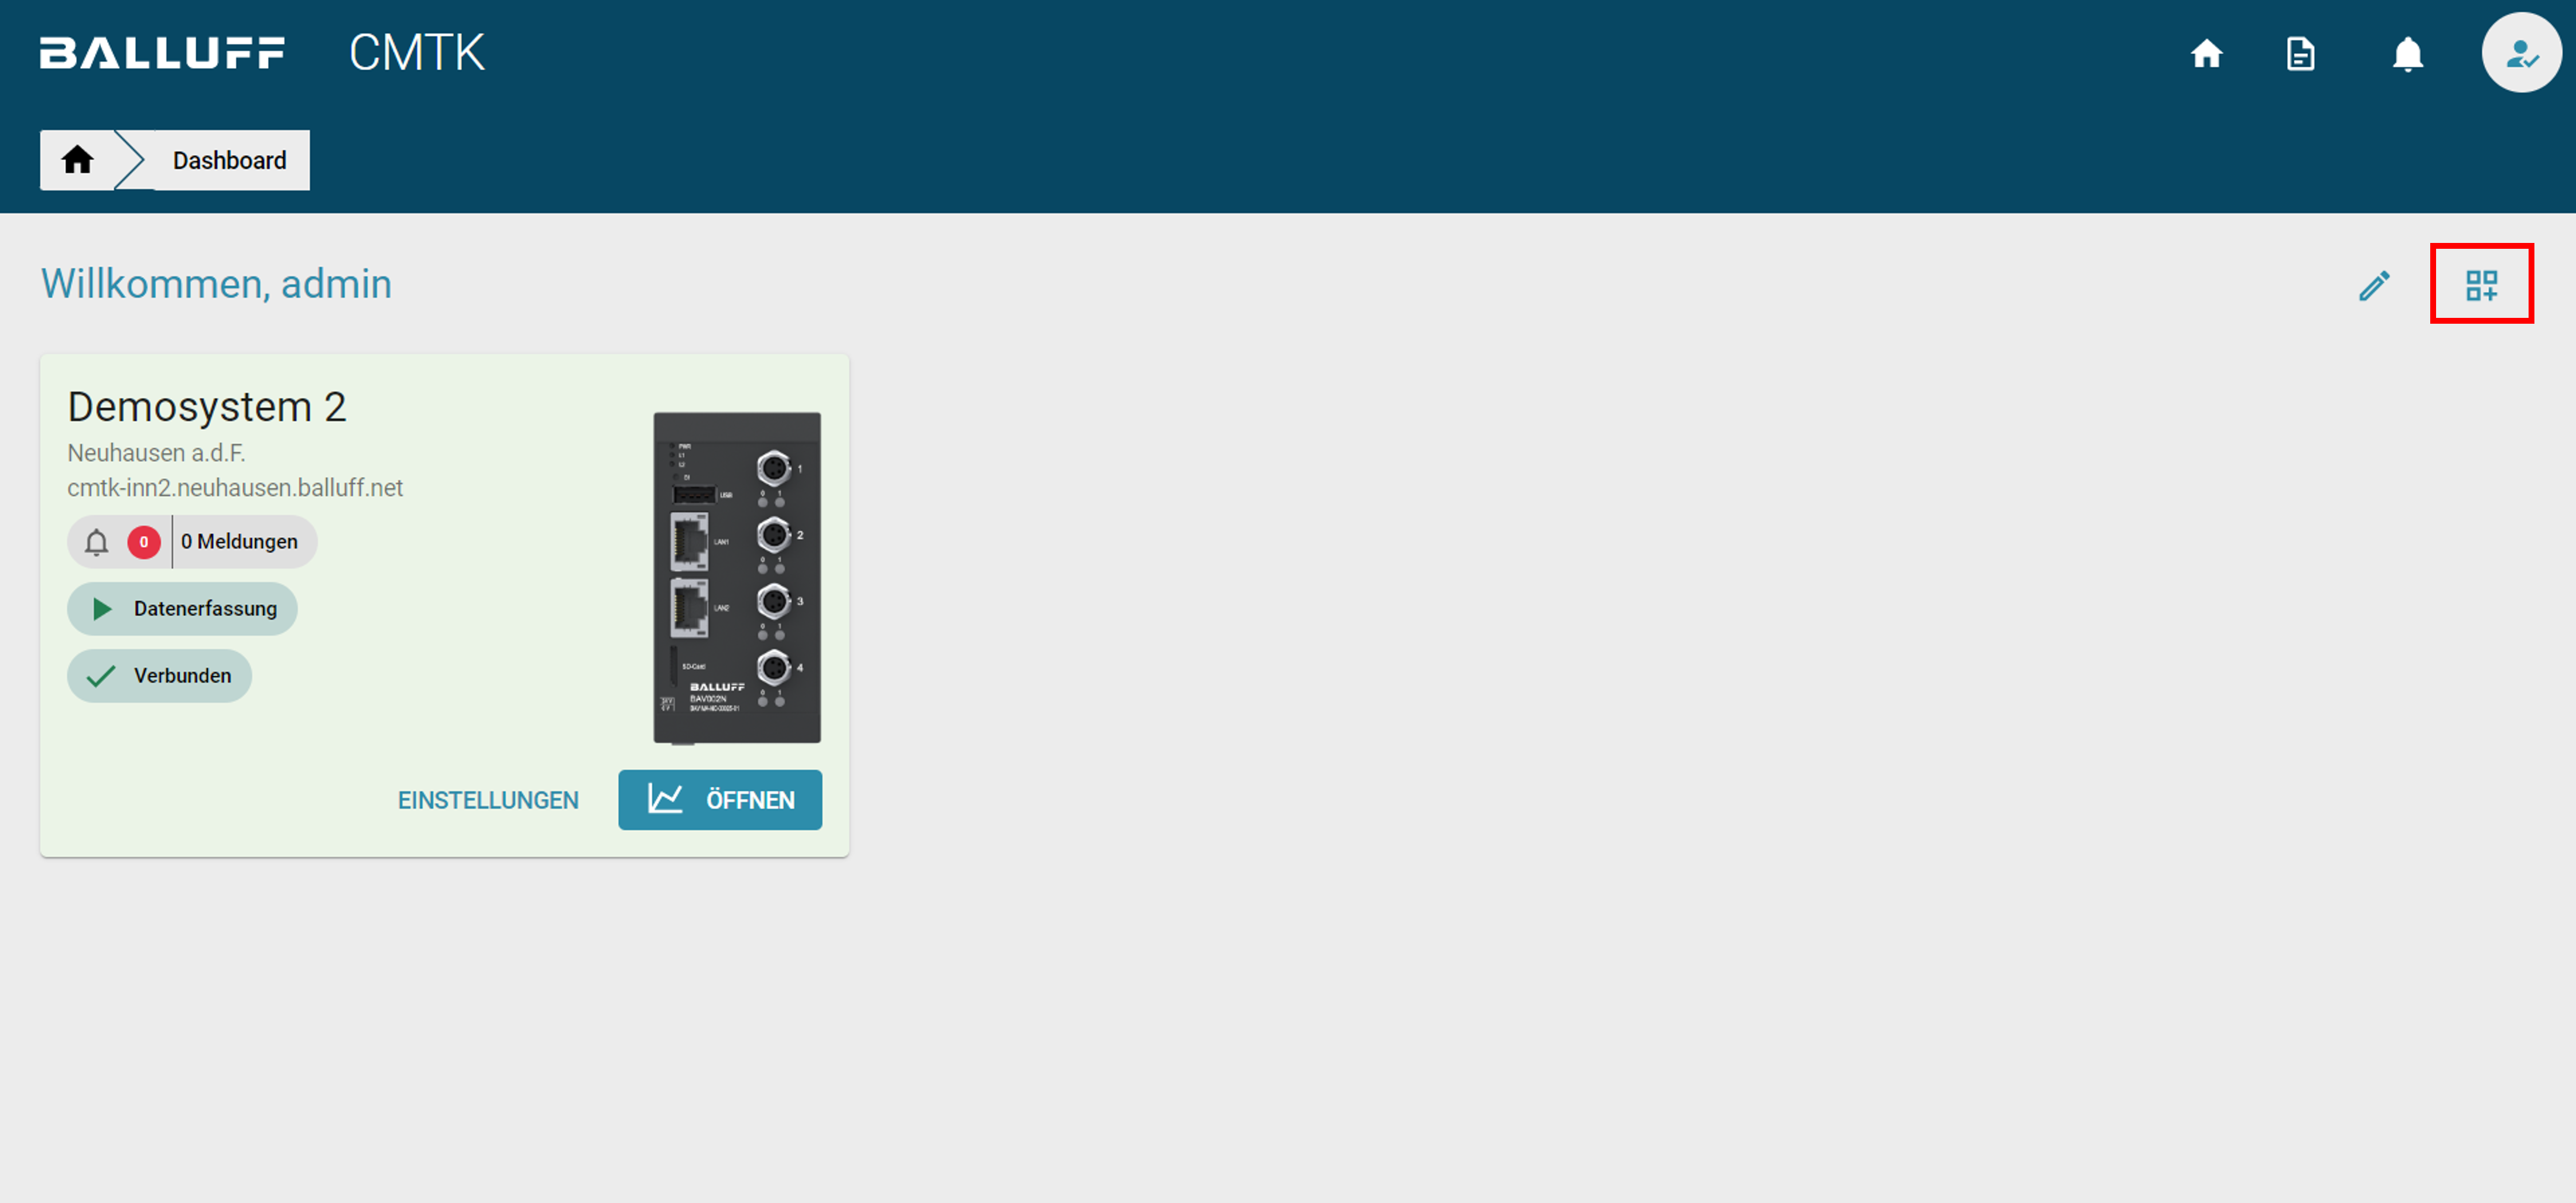
- To add a CMTK as a node, click on the icon for adding additional CMTKs. A wizard will open that will guide you through the necessary steps.
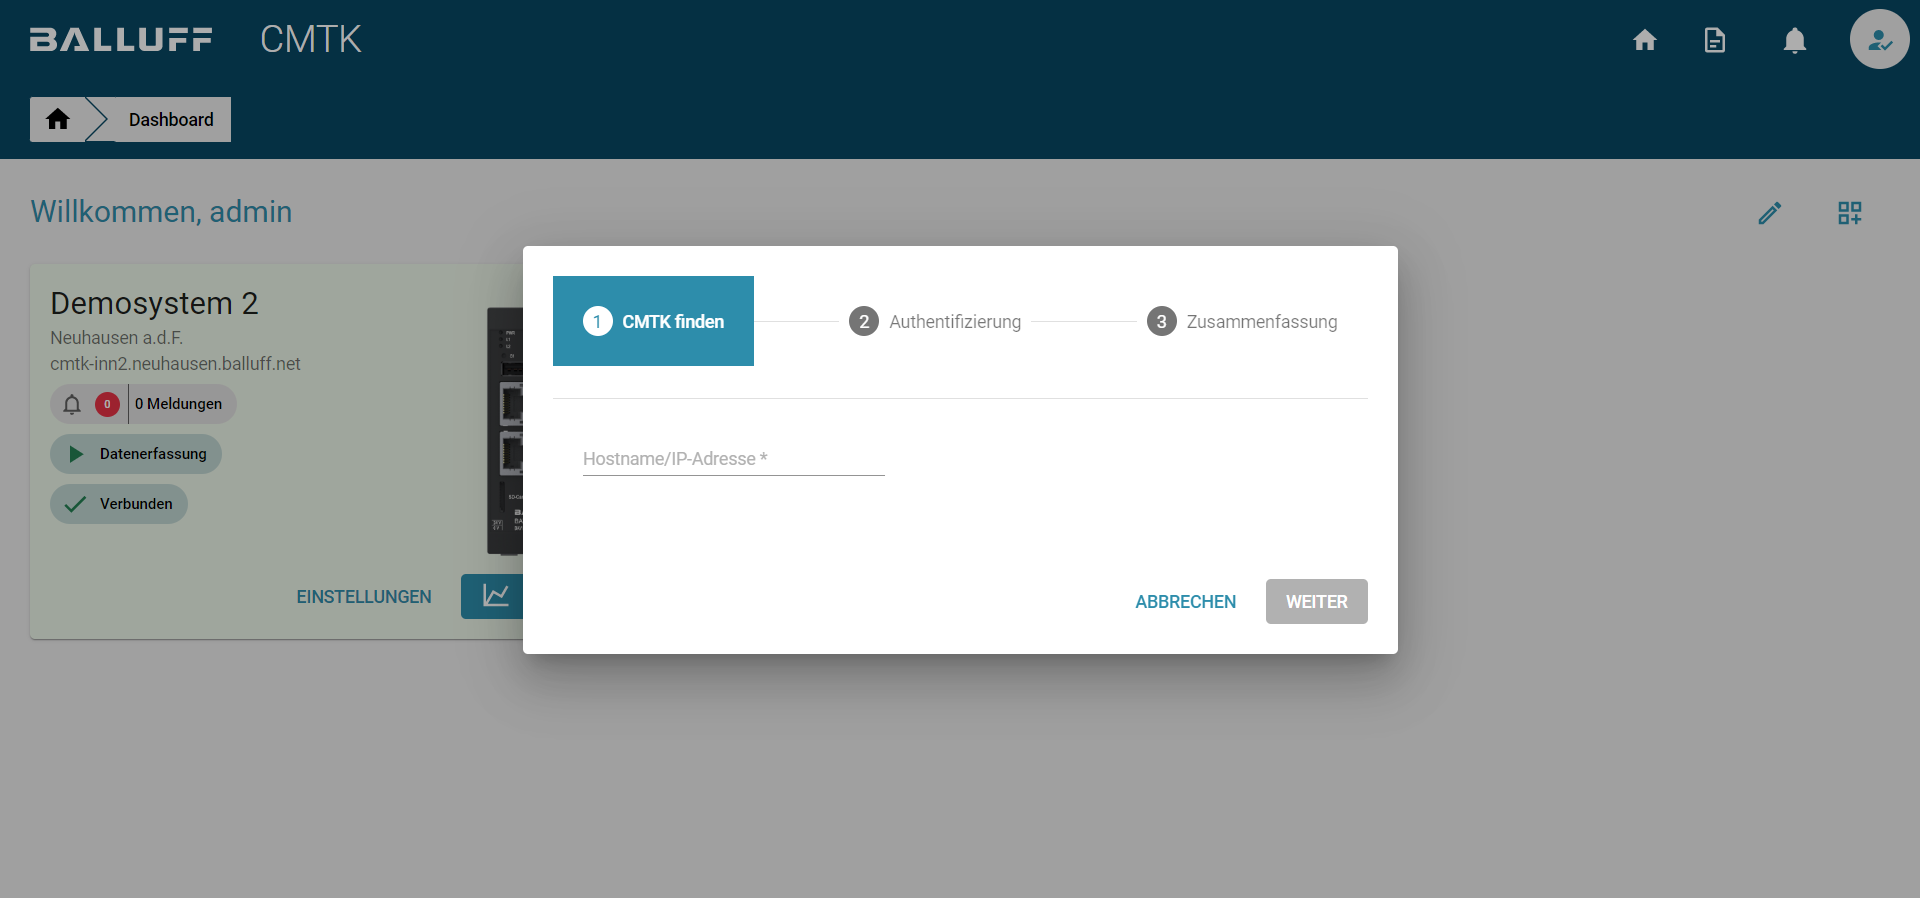
- Then please enter the IP address or hostname of the CMTK to be added as a node.
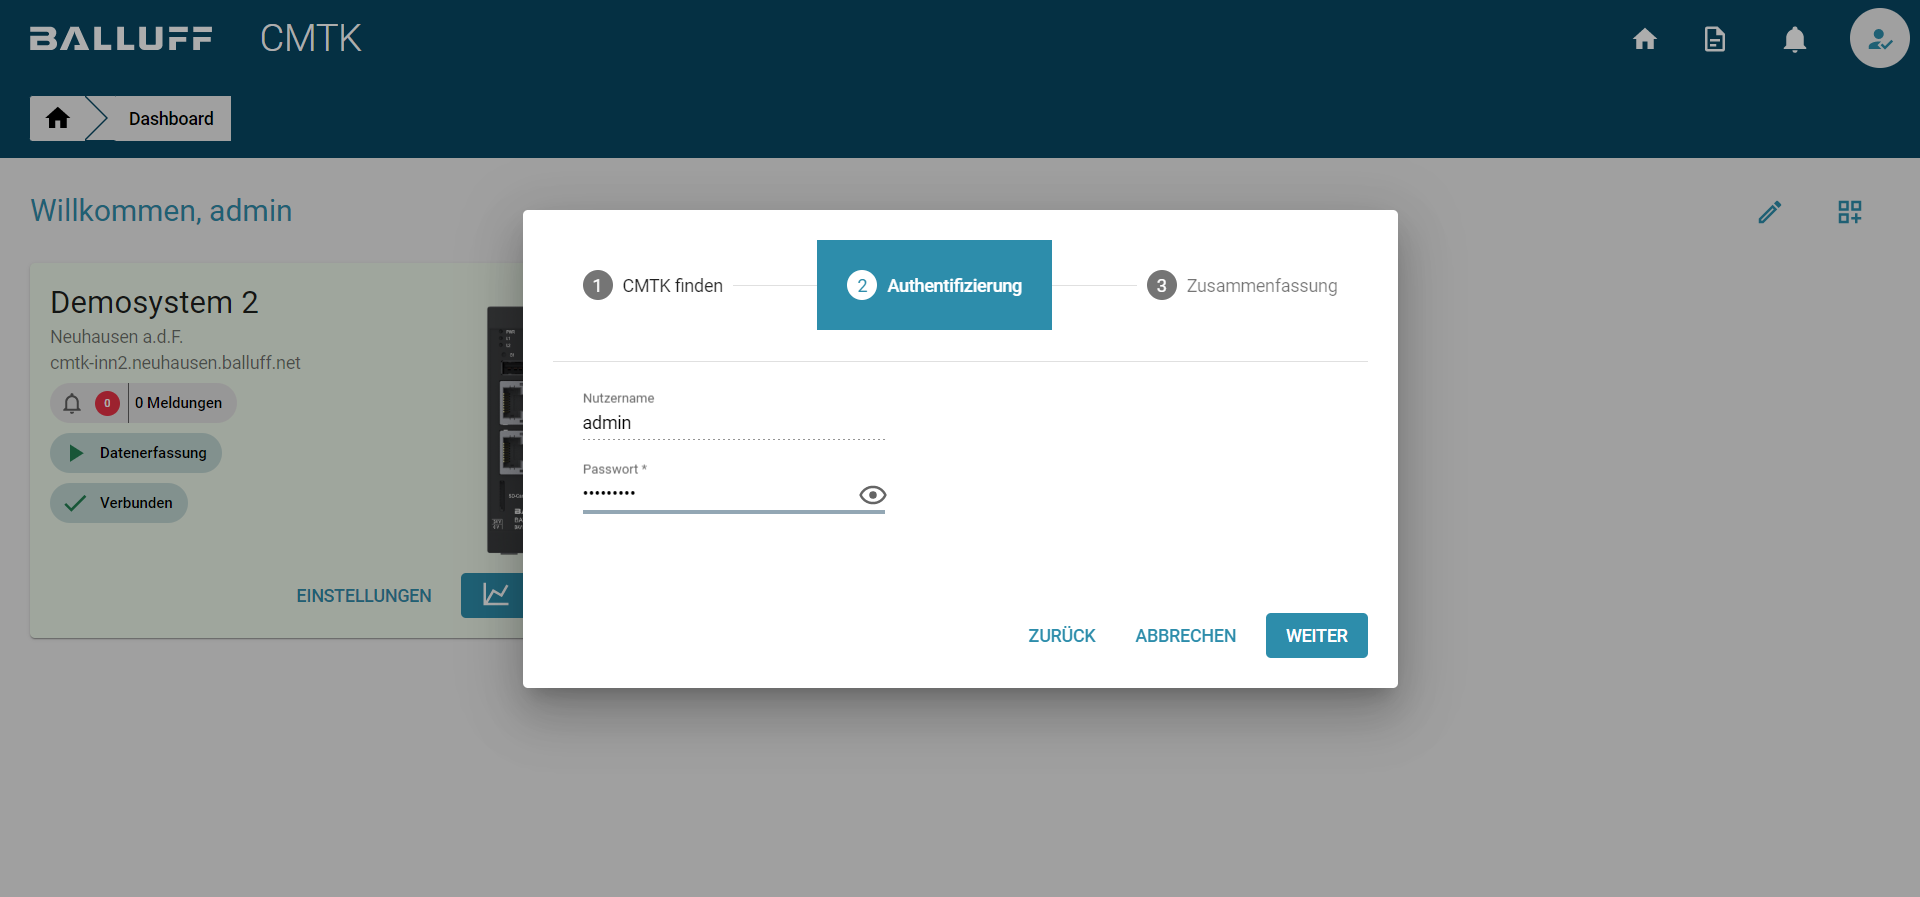
- In the next step you will be asked for the admin password for the CMTK to be added.
- Afterwards, you will receive a summary and preview of the added system in the wizard. By "add now" you complete the wizard successfully.
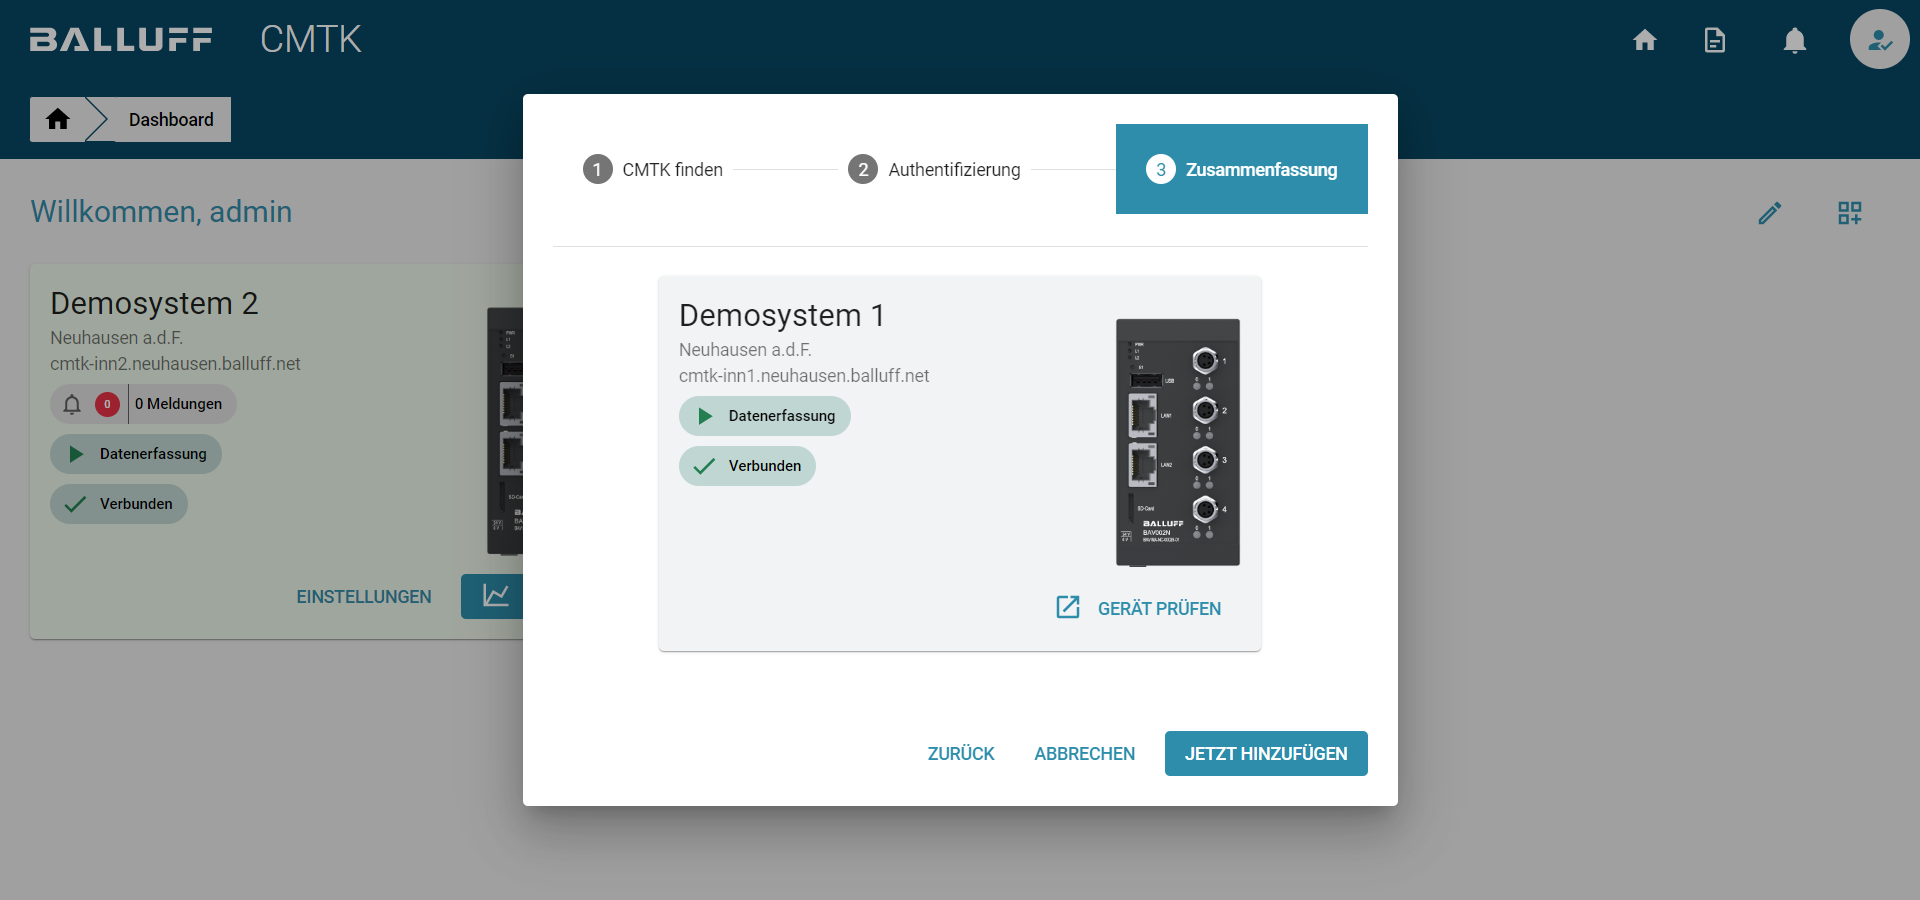
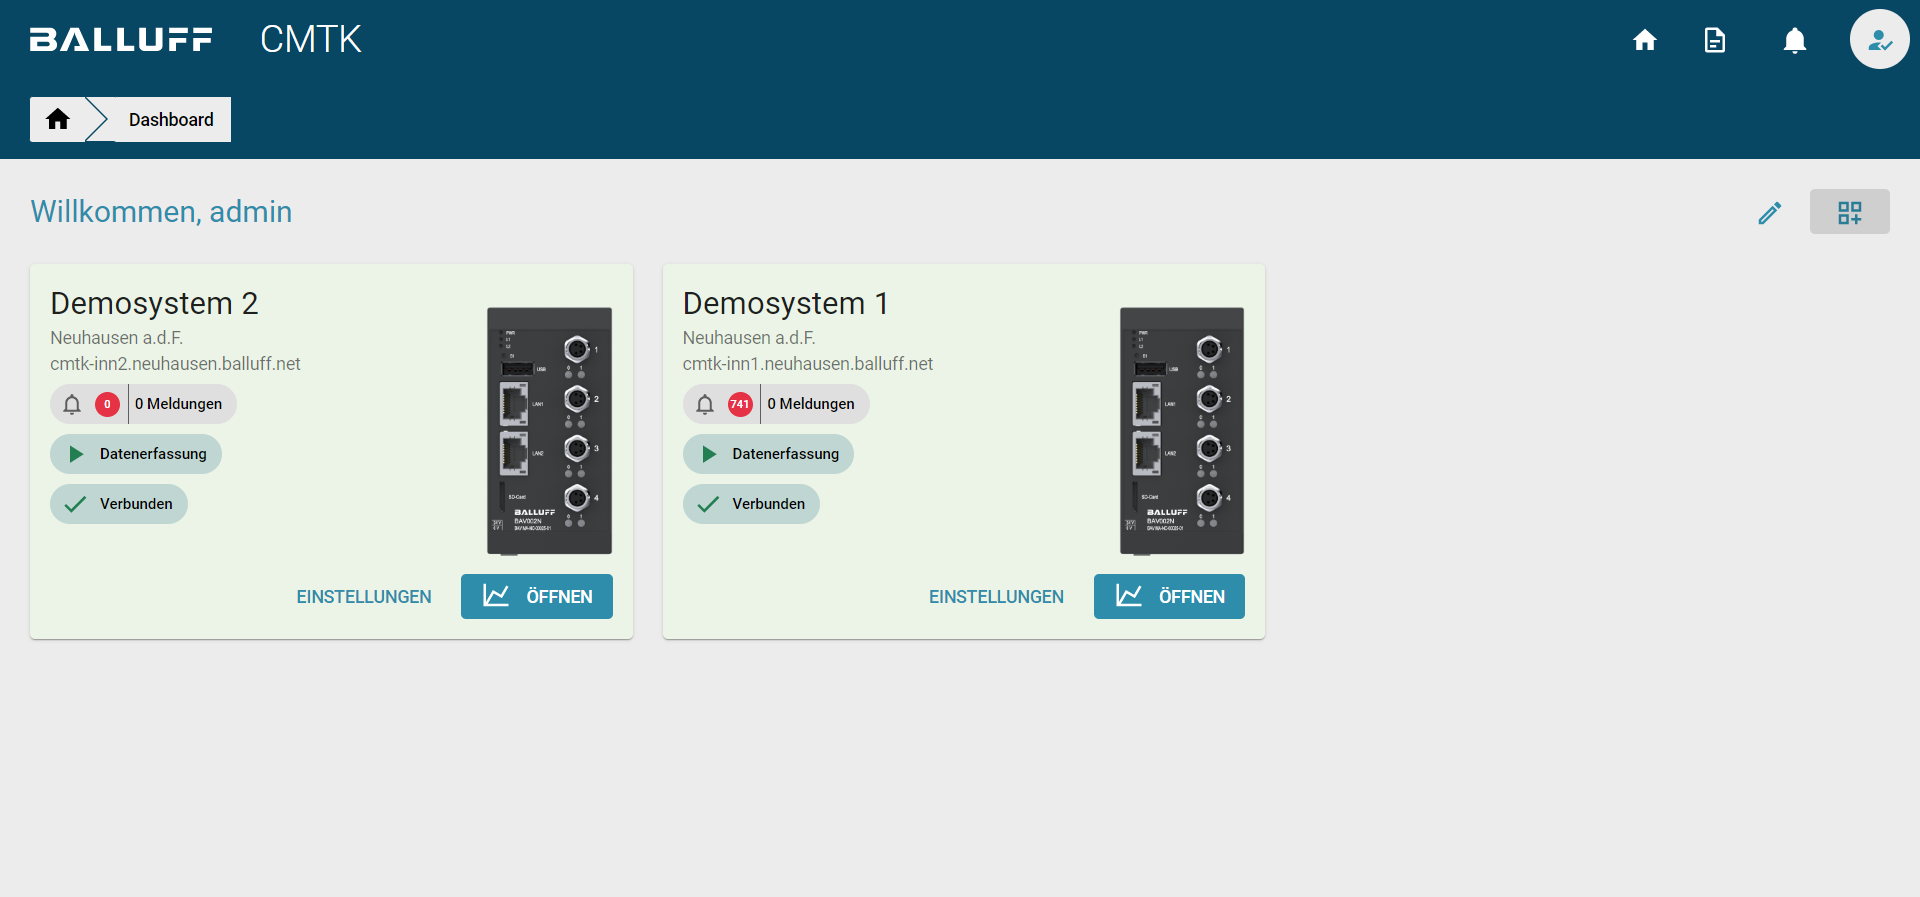
- The added node-CMTK will then appear in the overview page of the primary CMTK.
Note
Access to the node CMTKs is possible with any user, provided that this user is also created on the node CMTK. The user rights on the respective Node-CMTK are taken into account.
Note
It is possible to add a node CMTK to several primary CMTKs. So you can create an individual overview according to your requirements.
Removing a node CMTK from the overview
You can also remove a node CMTK from the overview. To do this, as a user with admin rights, first click on the function to change the overview page. 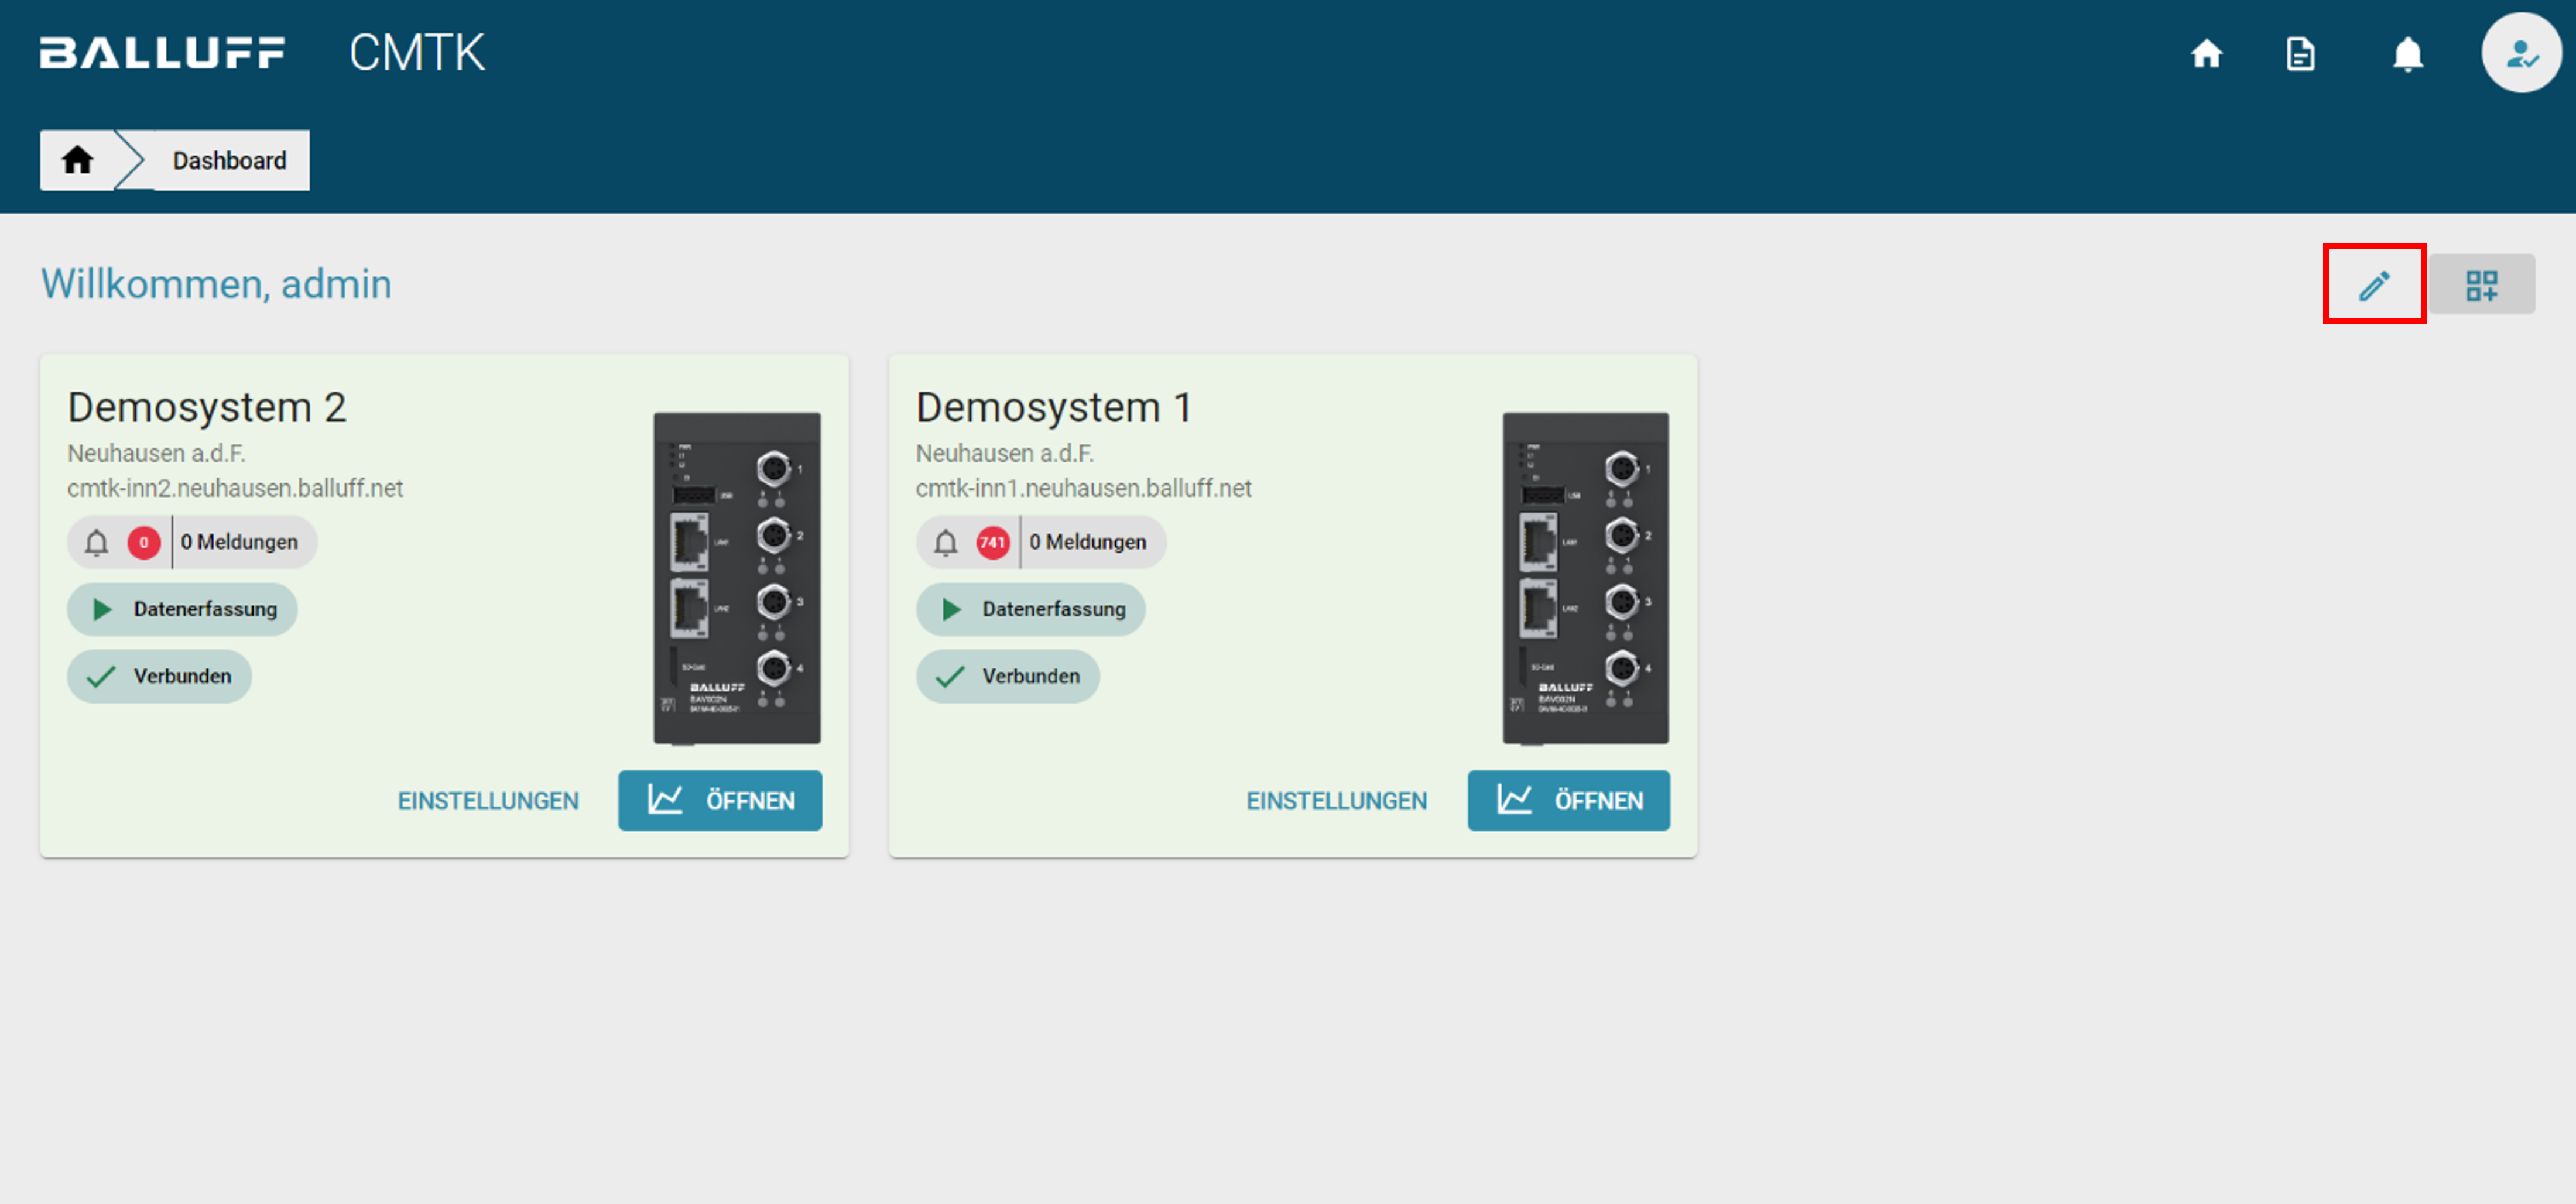
You can then remove any Node-CMTK by clicking on "Delete". 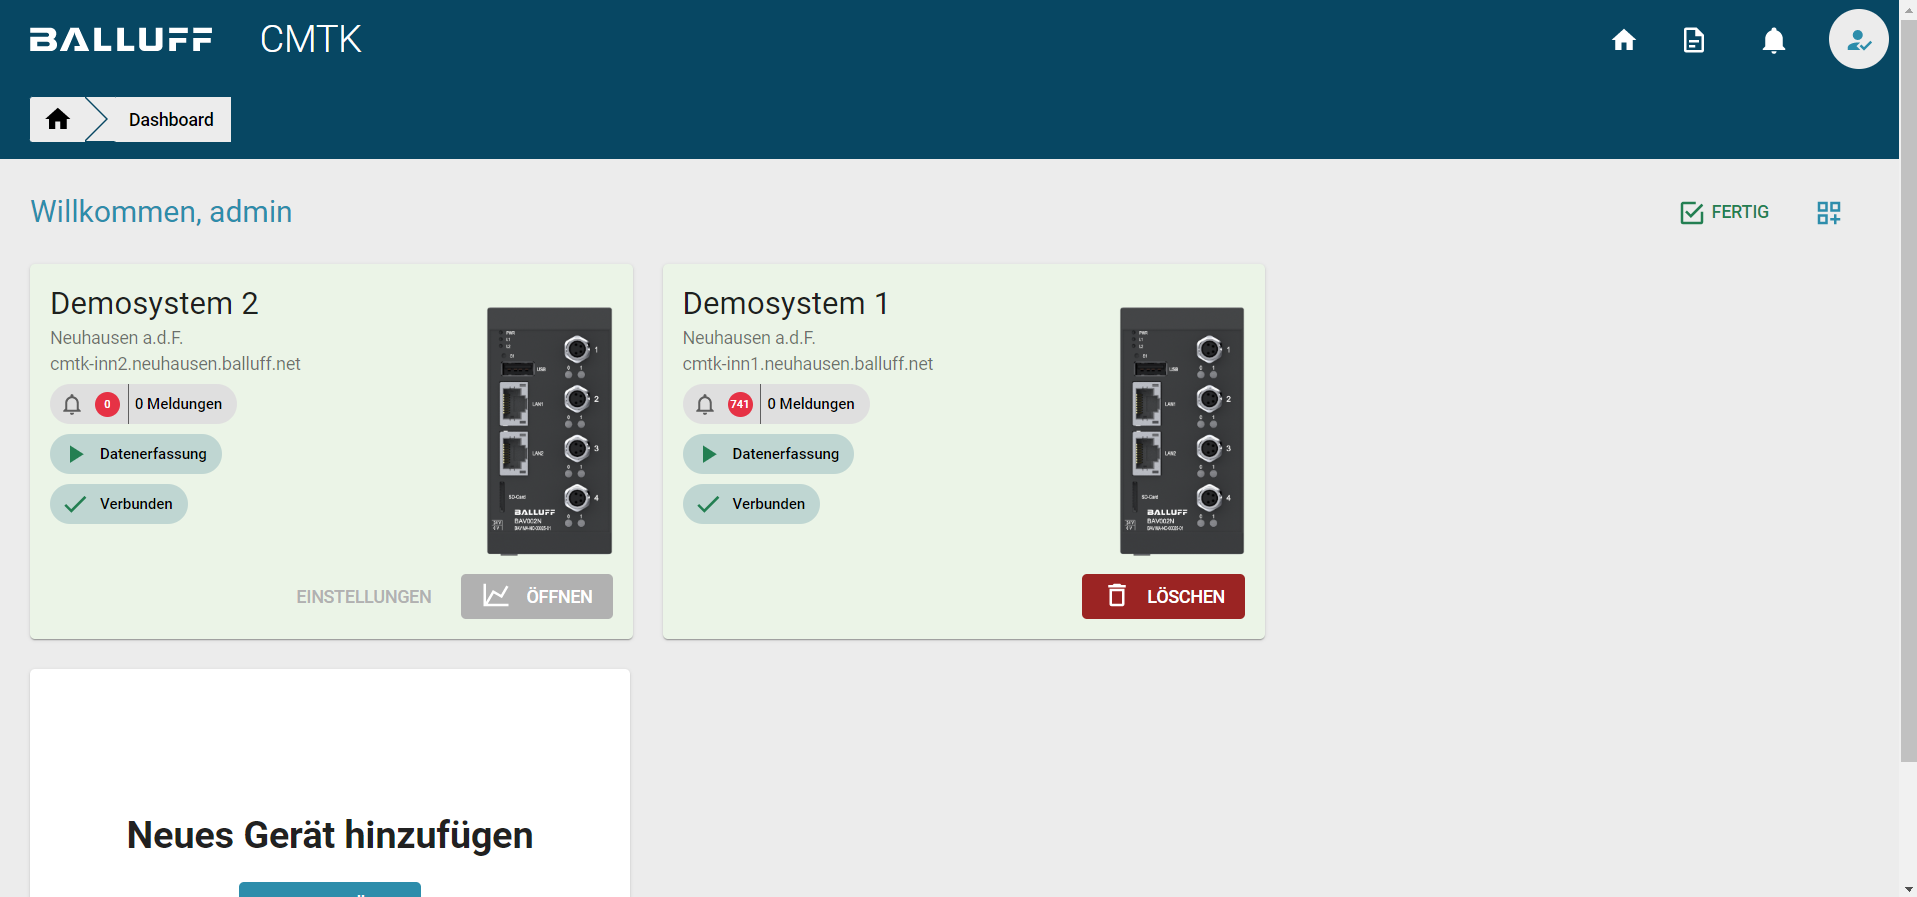
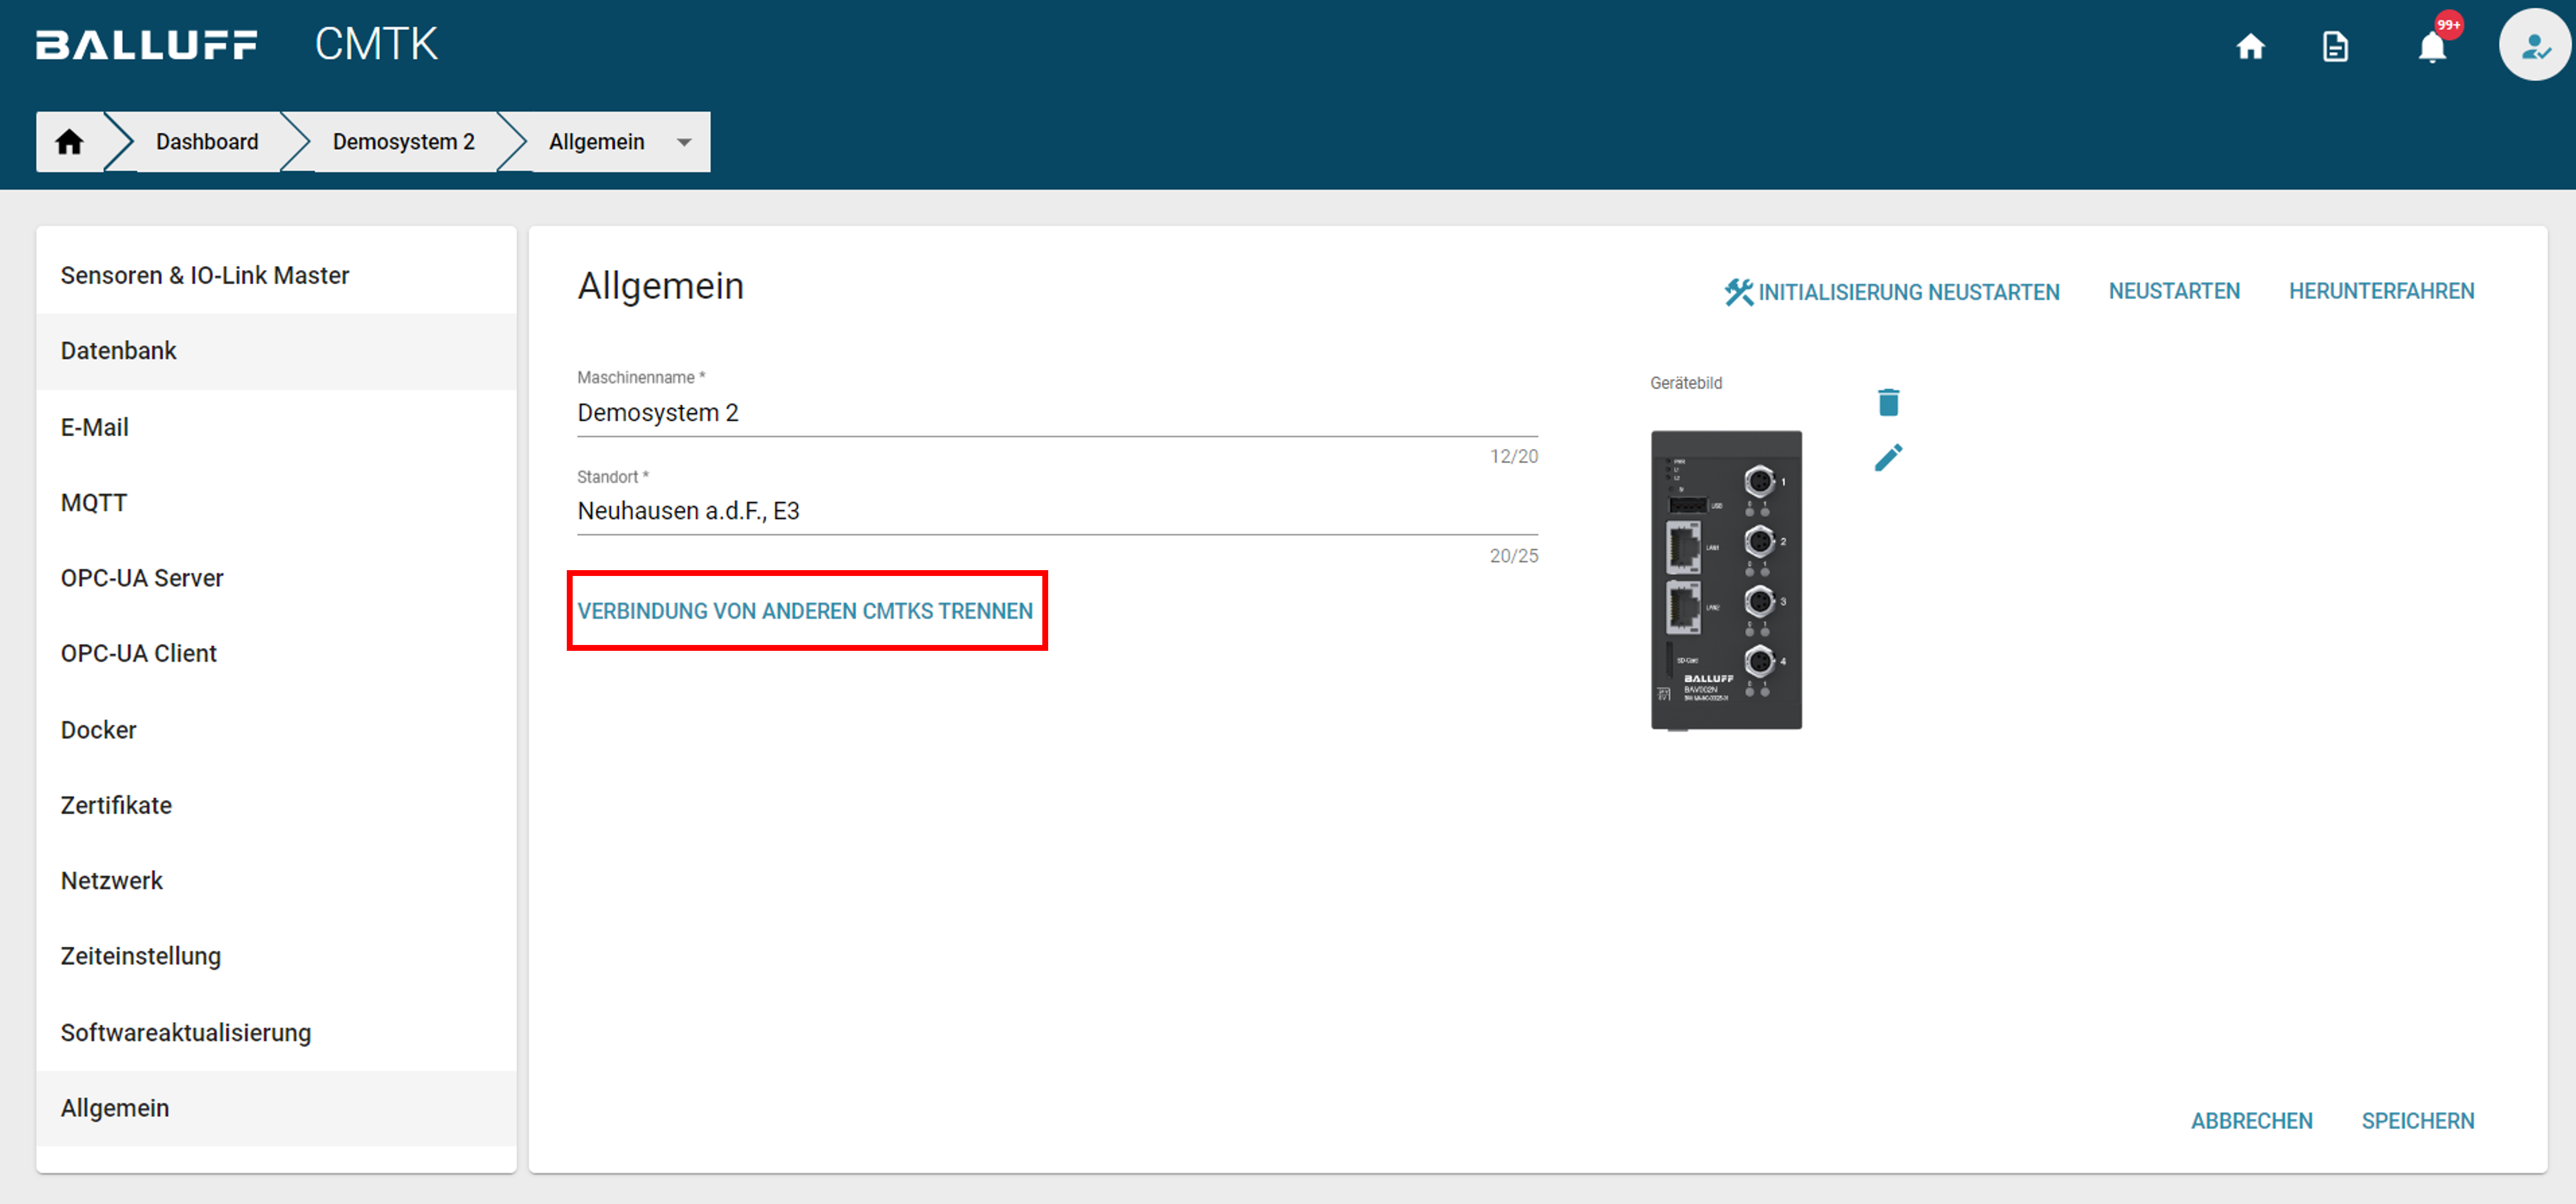
Alternatively, you can also disconnect a Node-CMTK from all primary CMTKs under Settings -> General.