Start screen
Jan 28, 2026 | 391 words | 2 min reading time
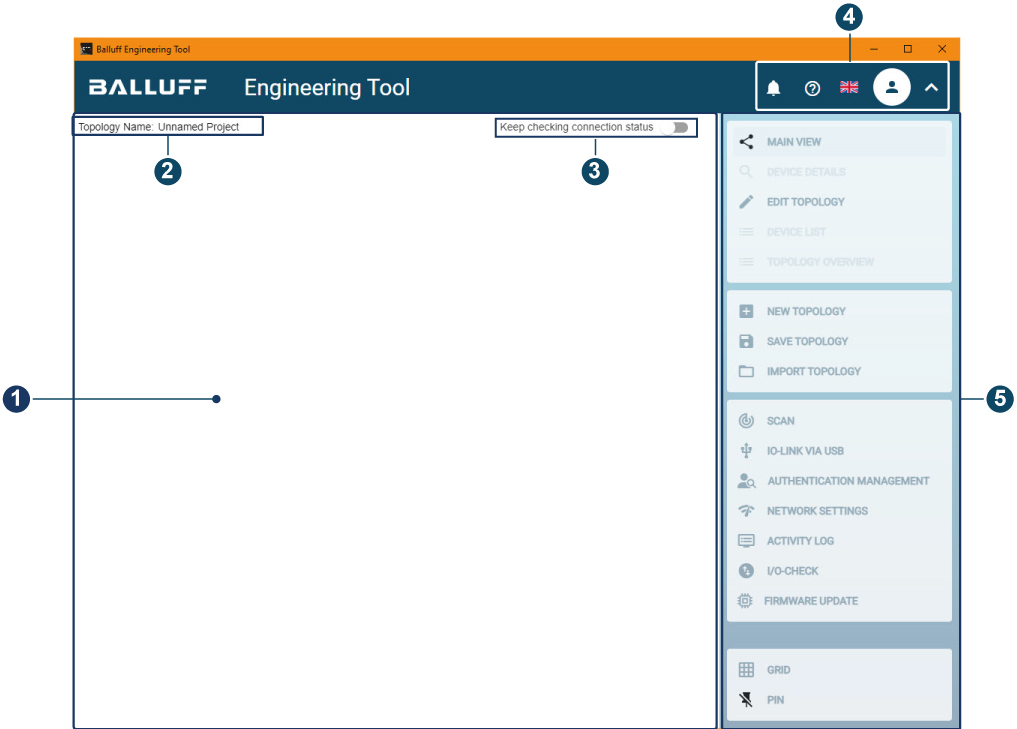
After successful login, the following startup screen appears:

Start screen after login (without topology)
Pos. |
Description |
|---|---|
1 |
Workspace with views |
2 |
Name of the loaded topology, see Rename topology. |
3 |
Continuous connection check, see Continuously check connection status. |
4 |
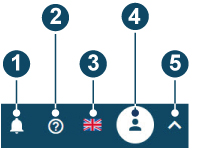
Navigation bar, see Navigation bar. |
5 |
Function bar, see Function bar. |
Workspace
The view selected in the toolbar is displayed in the workspace. You can choose between the following views:
Main View
Opens the topology area, which displays the topology with the IO-Link network modules and the IO-Link devices (sensors and actuators). You can add the devices in the planning phase from a device catalog that is available in the “Topology editing” view. The catalog includes a large number of IO-Link devices. You can save the topologies and device parameters and import them as a basis for new planning or commissioning. For more information on creating topologies, see Create topology manually.
When you commission a new machine, you can detect physically existing IO-Link devices via PROFINET or EtherNet/IP connections and set up the BET topology automatically, see Scan existing topology (find devices). The topology created in this way appears in the main view for further editing.
Note
You can call up the main view at any time via the function bar.
Device details
Opens the detail view. The detailed view displays, for example, the parameter values, process data and diagnostic information of the IO-Link network module or the IO-Link device, see View and edit device details.
Note
You can access the detailed view as follows:
Via the function bar when an IO-Link network module or an IO-Link device is selected in the main view.
By double-clicking on an IO-Link network module or an IO-Link device in the main view.
Within the topology overview via the link DETAIL VIEW.
Edit Topology
Opens the device catalog for adding new IO-Link devices to the topology, see Add devices from catalog to topology.
Note
You can call up topology editing at any time via the function bar.
Device List
Opens an overview of all devices present in the current topology, see Display and export device list of all devices.
Note
You can only call up the device list via the function bar if an IO-Link network module or an IO-Link device is present in the main view.
Topology Overview
Opens an overview of the IO-Link network modules and the IO-Link devices connected to them, see Show topology overview.
Note
You can only call up the topology overview via the function bar if an IO-Link network module or an IO-Link device is present in the main view.
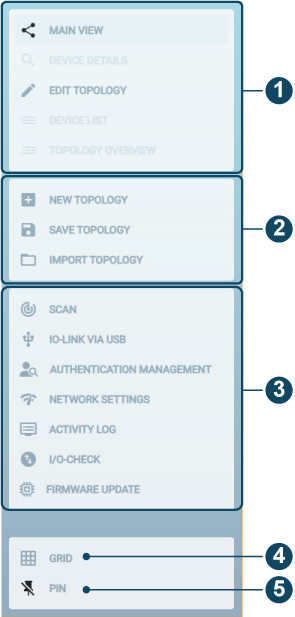
Function bar
In the toolbar, select the desired view for the workspace and other context-sensitive functions.

Function bar
Position |
Description |
|---|---|
1 |
Opens the selected view in the workspace. For more information, |
2 |
Functions for topology editing, see |
3 |
Functions for diagnostics, see: |
4 |
Displays grid lines in the main view, |
5 |
Displays the function bar reduced, see Show function bar reduced. |
