Scan existing topology (find devices)
Dec 04, 2025 | 885 words | 4 min reading time
You can scan a physically existing IO-Link topology with the BET and display its structure in the main view. The following requirements must be met for this:
The topology in which IO-Link network modules and IO-Link devices are to be searched and the network adapter of the workstation on which the BET is installed must be in the same network and IP address range. A search via a gateway or a search outside the address range of the network adapter is not possible.
If you use a USB Ethernet adapter, it must be set accordingly and the USBpCap software must be installed, see FAQs about firewall and IO-Link network.
Connected IO-Link devices are detected by using several protocols. For this purpose, the following ports must be enabled in the firewall settings of the PC for the BET :
UDP port <2000> for incoming messages
UDP port <1999> for outgoing messages
UDP port <2222> for incoming messages at CIP
44818 for Ethernet/IP CIP (outgoing)
Sharing must be done for private and public networks.
During the scanning process, all IP addresses in the defined address spaces are searched.
Note
Make sure that the network has been configured correctly, see Configure network.
Note
IO-Link devices (sensors and actuators) do not have their own IP address. They are addressed via the IO-Link network module to which the devices are connected.
Note
To set the firewall correctly, it may be important to know the path to the executable file of the BET . The executable file (Balluff Engineering Tool.exe) is located in the following folder after installation:
C:\Users\%UserName%\AppData\Local\Programs\Balluff Engineering Tool.
Select network adapter and address range and search for IO-Link network modules
If the requirements for scanning the topology are met, you can start a scan and then import all or some of the IO-Link devices found into the main view.
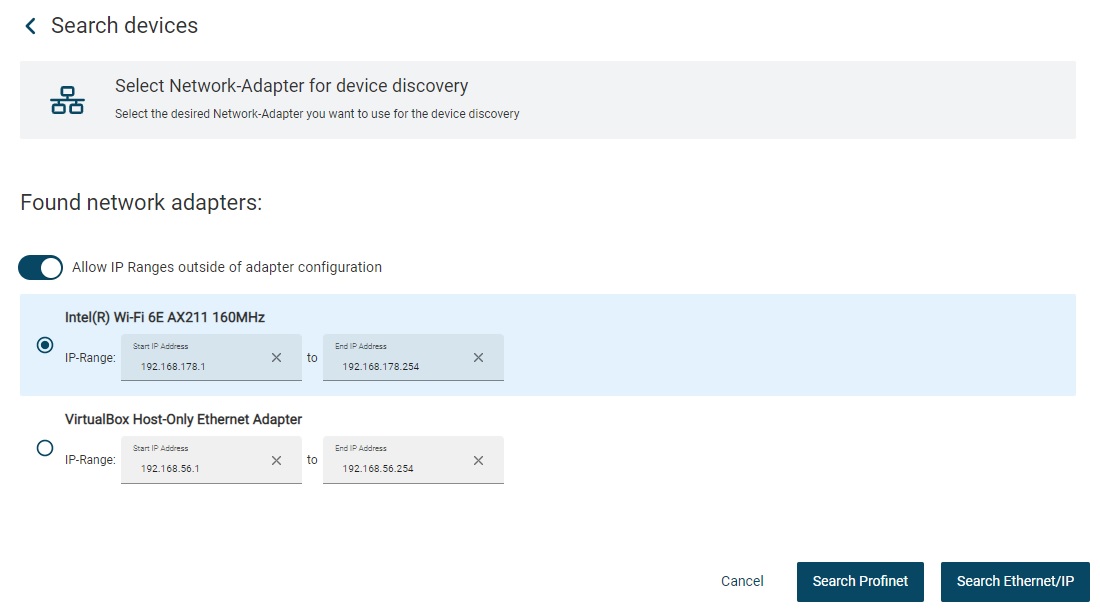
Click FIND DEVICES in the function bar.
The following dialog appears:
Note
If you have activated Scan by ping in the user settings, the following dialog appears:
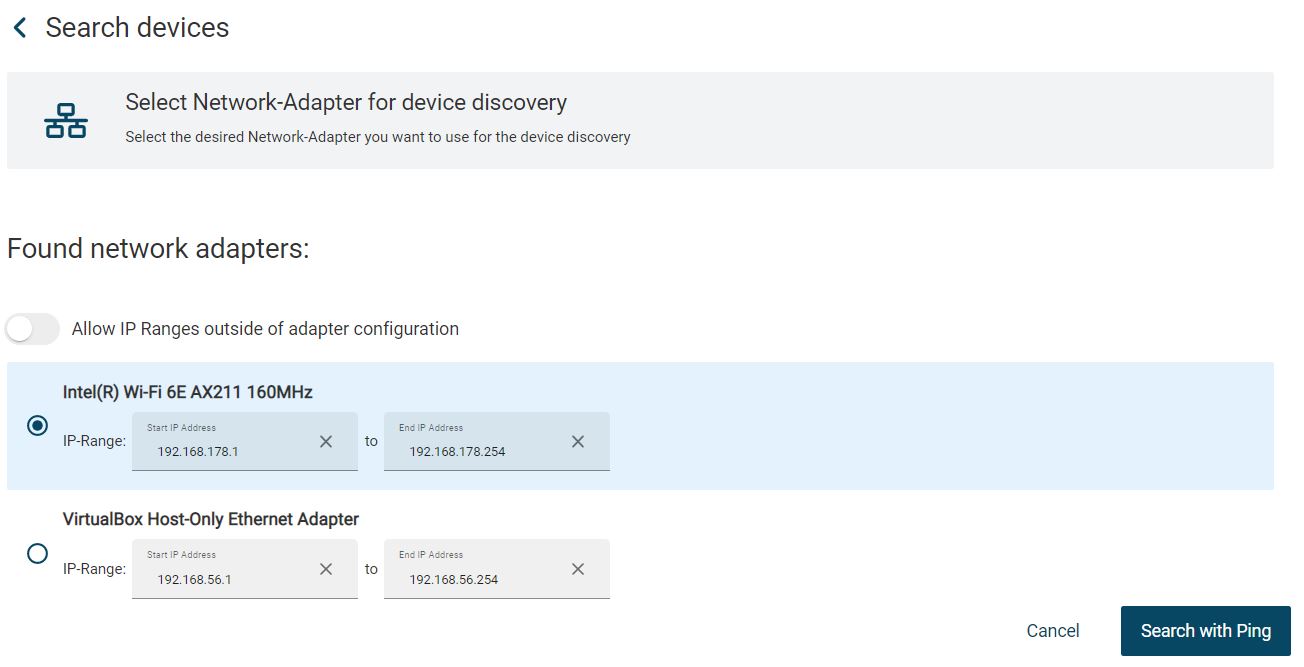
Select the network adapter via which the search for IO-Link devices is to be performed.
To change the address range of the network adapter, click Edit, enter the IP addresses, and click Save.
Note
By activating the “Allow IP ranges outside the adapter configuration” switch, you now have the option of searching for devices via IP ranges that are not covered by the selected network adapter. For example, you can search in IP ranges 192.xxx.xxx.xxx and 10.xxx.xxx.xxx at the same time.

Note
If you make an invalid entry, the BET will alert you. Correct the entry and click Save:

Click PROFINET SEARCH to search for IO-Link devices on the PROFINET bus, or click ETHERNET/IP SEARCH to search for IO-Link devices on the EtherNet/IP bus.
The IO-Link network modules found are listed as a result.
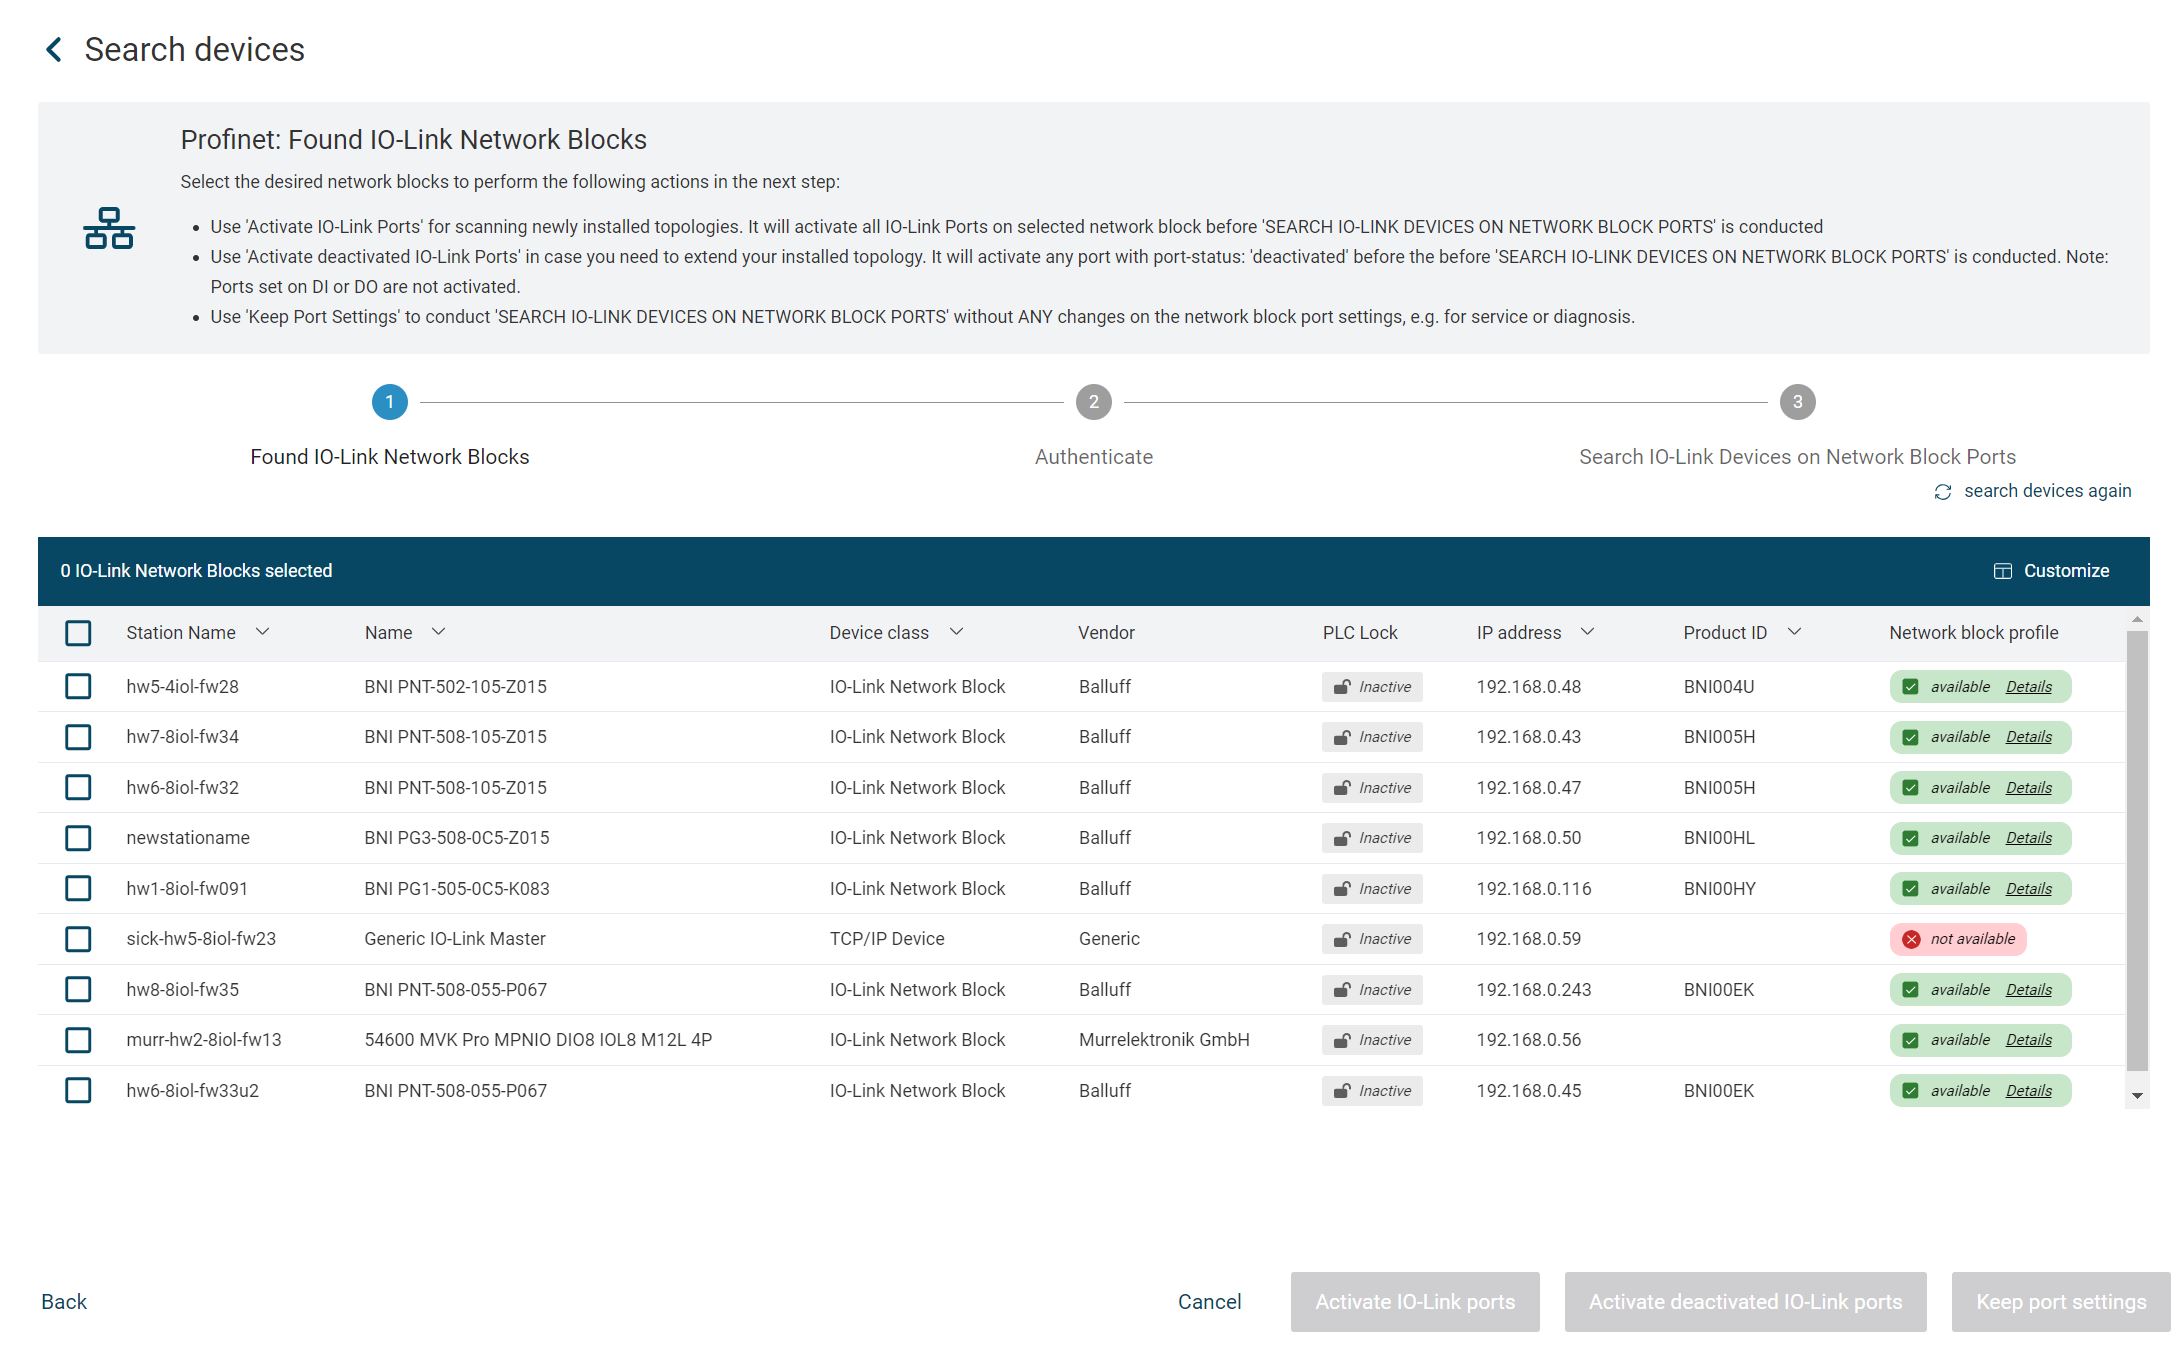
Result of the scan process (PROFINET)
Note
If not all IO-Link network modules are found on the bus, you can check the connection on the device and perform the search again with SEARCH DEVICES AGAIN.
Note
You can customize the table view, see Customize table view.
Devices whose device description files are also available in the BET database are displayed in the Device class column as IO-Link device or IO-Link network module. Devices whose device description file is not available in the BET database are displayed in the Device class column as Generic IO-Link device or Generic IO-Link network module. In this case, you should include the device description file in the database, see Import device description files.
Note
The devices found can be components of the searched topology. Other network-enabled devices located in the searched address range can also be found.
Make port settings on found IO-Link network modules
Activate the IO-Link network modules that are to be adopted in the topology.
Note
All found IO-Link devices of an IO-Link network module are always taken over.
Select the desired action for the selected IO-Link network modules:
Enable IO-Link ports: All IO-Link ports are switched on before the search, e.g. because you are creating a new topology.
Enable disabled IO-Link ports: All disabled IO-Link ports are switched on before the search, e.g. to add new IO-Link devices to the topology at the IO-Link network module.
Keep port settings: The port settings are not changed for the search, e.g. if you want to perform a diagnosis.
If you select an option where you change the port settings, the following warning appears:
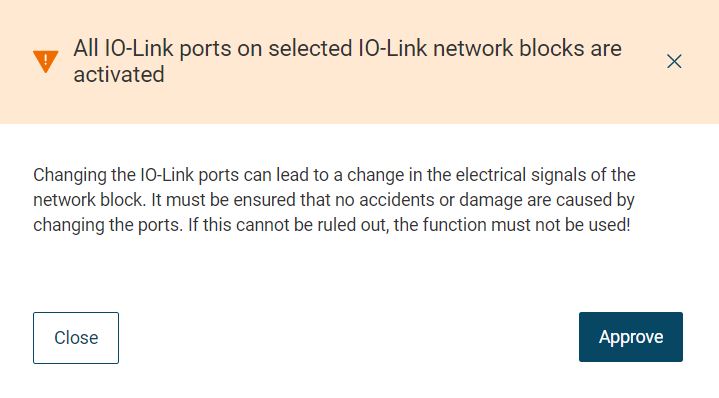
Example: When “Activate IO-Link ports” is selected
Read carefully the hint text and click ACCEPT.
If you have already loaded a topology in the main view, you will be prompted to save it.
Save the topology and click ACCEPT.
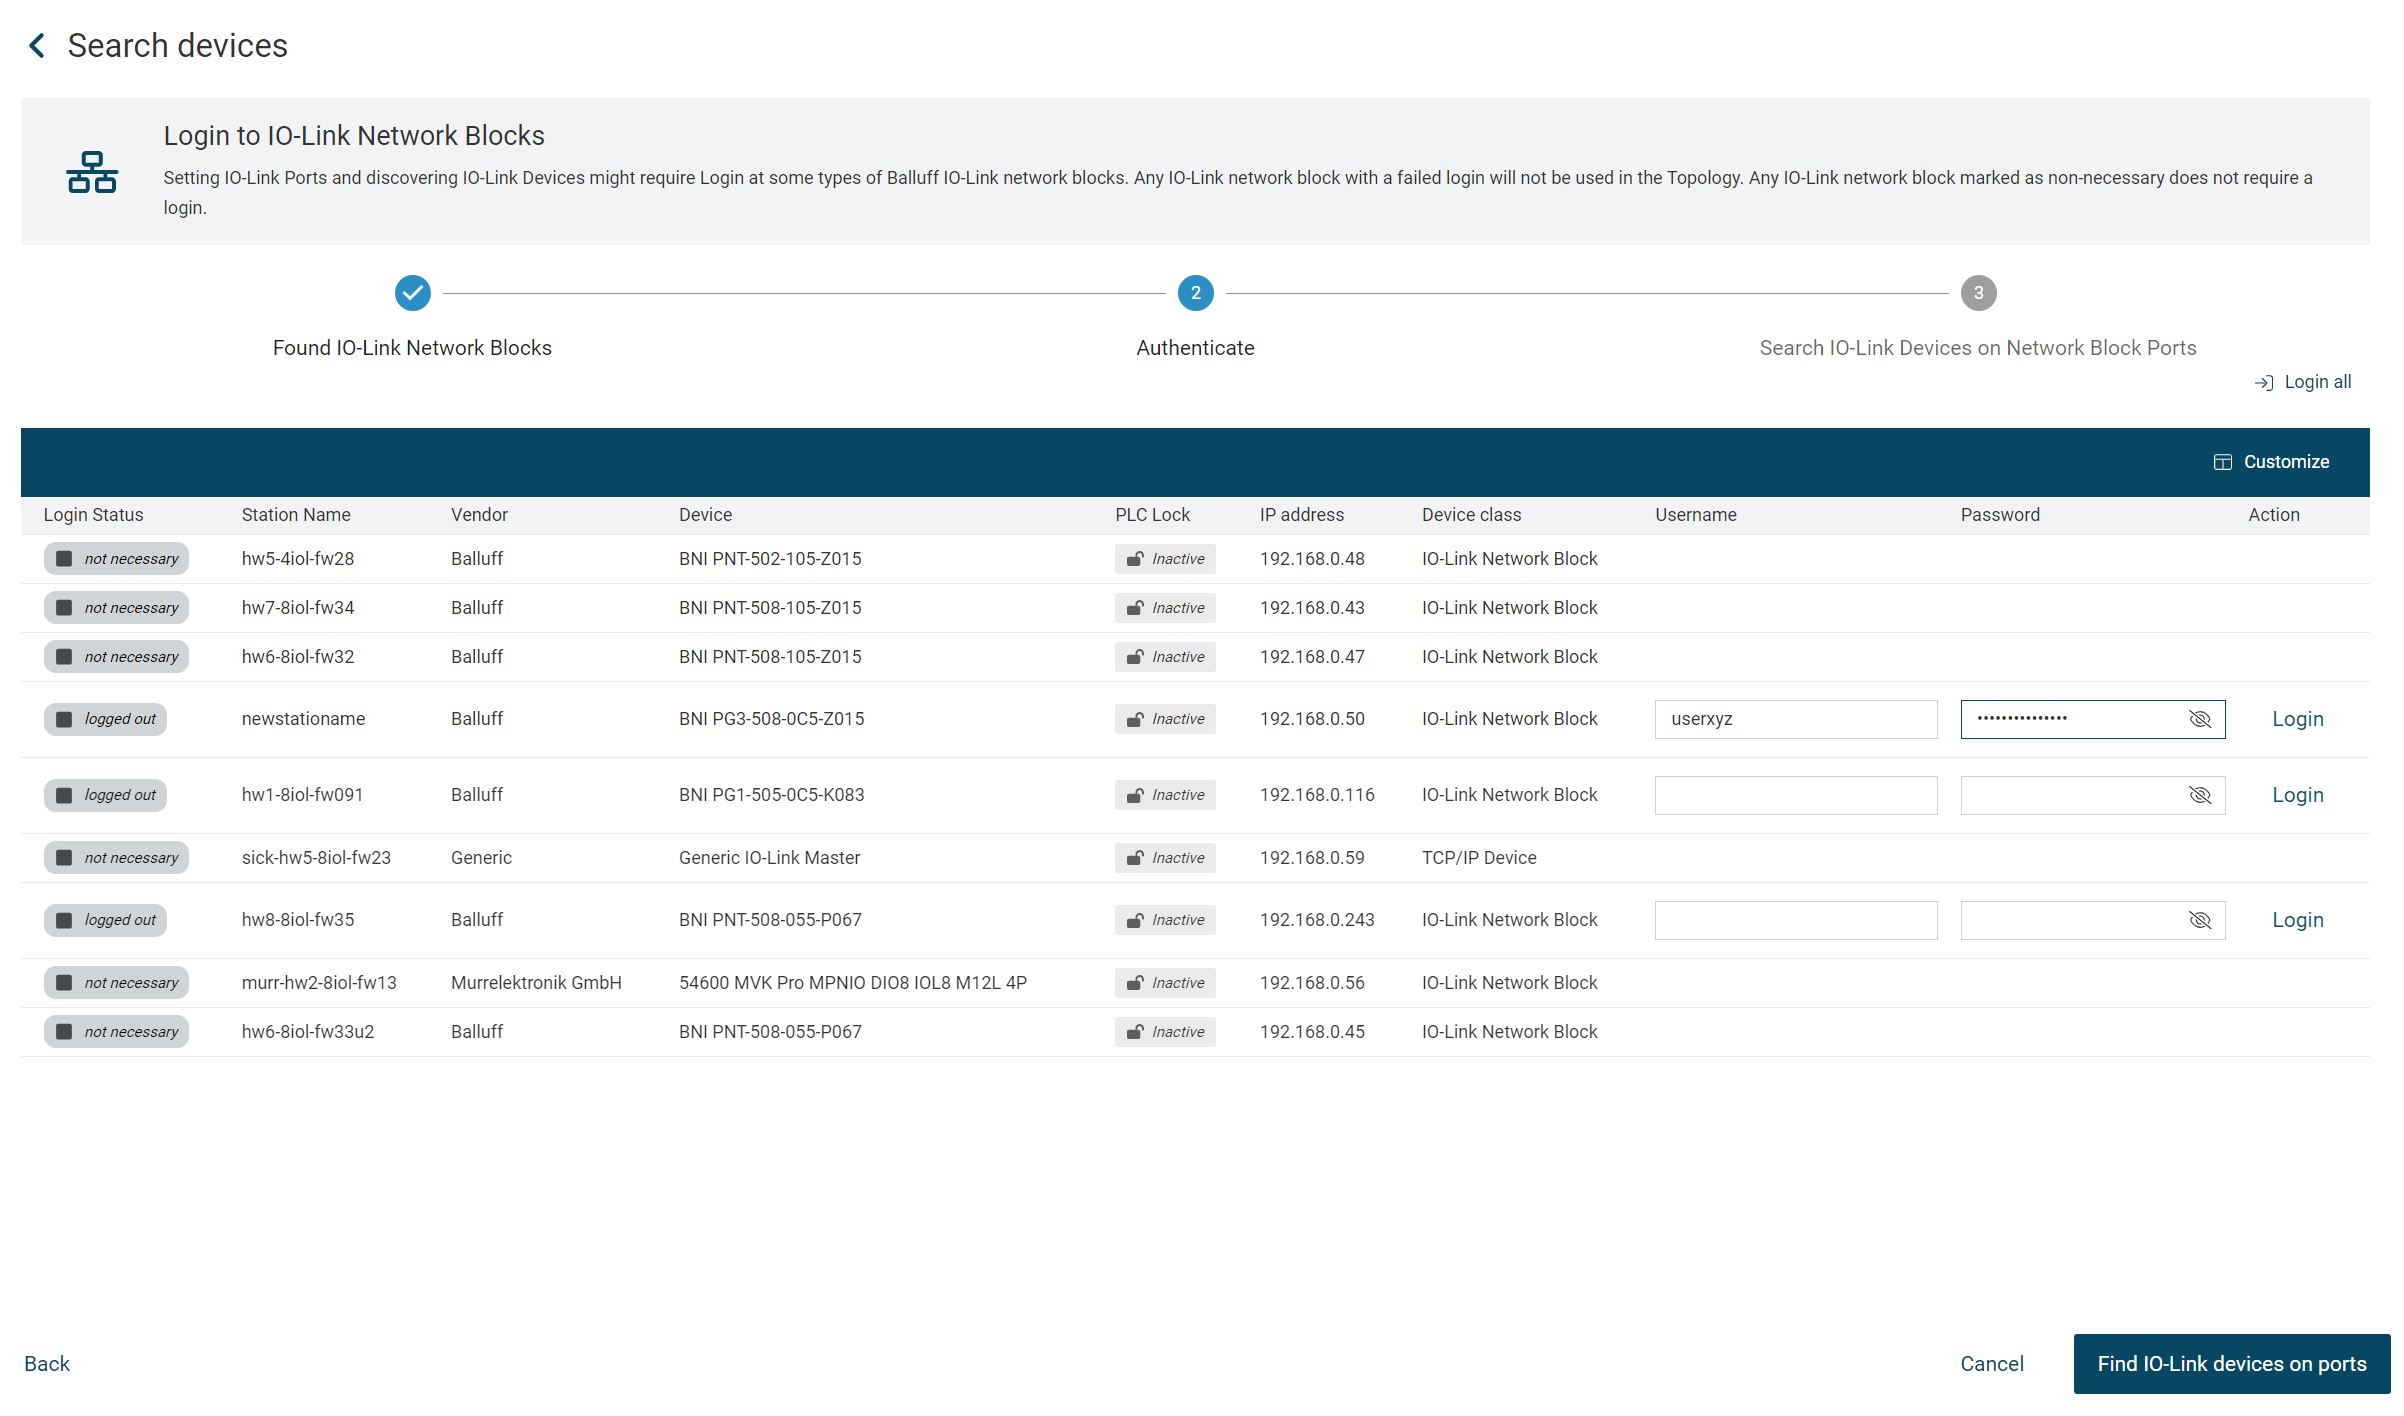
The following dialog appears:
Note
For devices that require authentication, the input fields for user name and password also appear. Authentication takes place as soon as you have filled in the fields with the correct data and click on Login.
Click FIND IO-LINK DEVICES AT PORTS.
The following dialog appears:
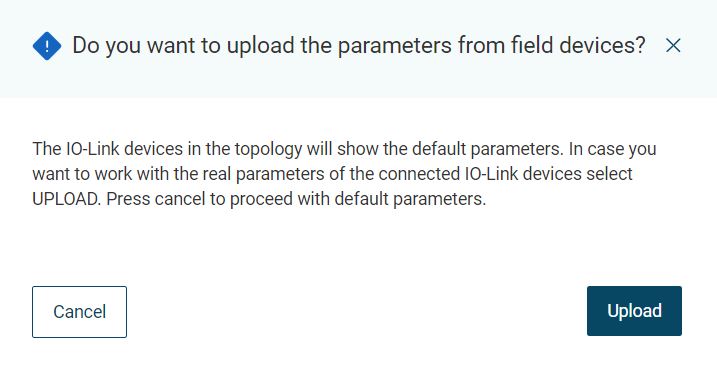
If you want to transfer the parameters of the connected IO-Link devices to your topology, click UPLOAD, otherwise select Cancel to continue with the default parameters.
If you answer the query with UPLOAD, the progress will be displayed in the following dialog:
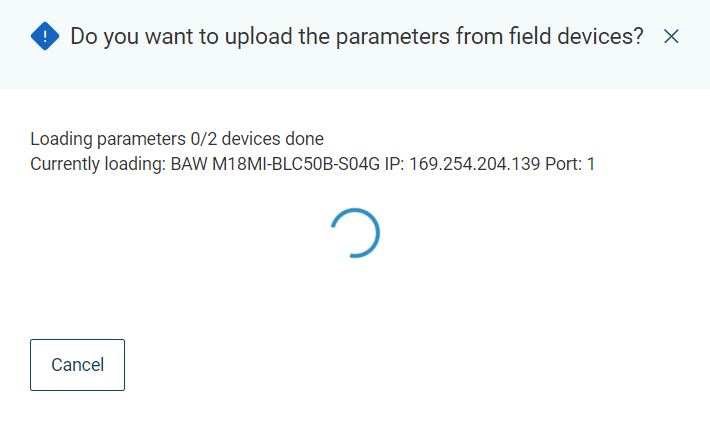
Once the transfer of parameters has been completed, the IO-Link network modules with the IO-Link devices found are displayed.
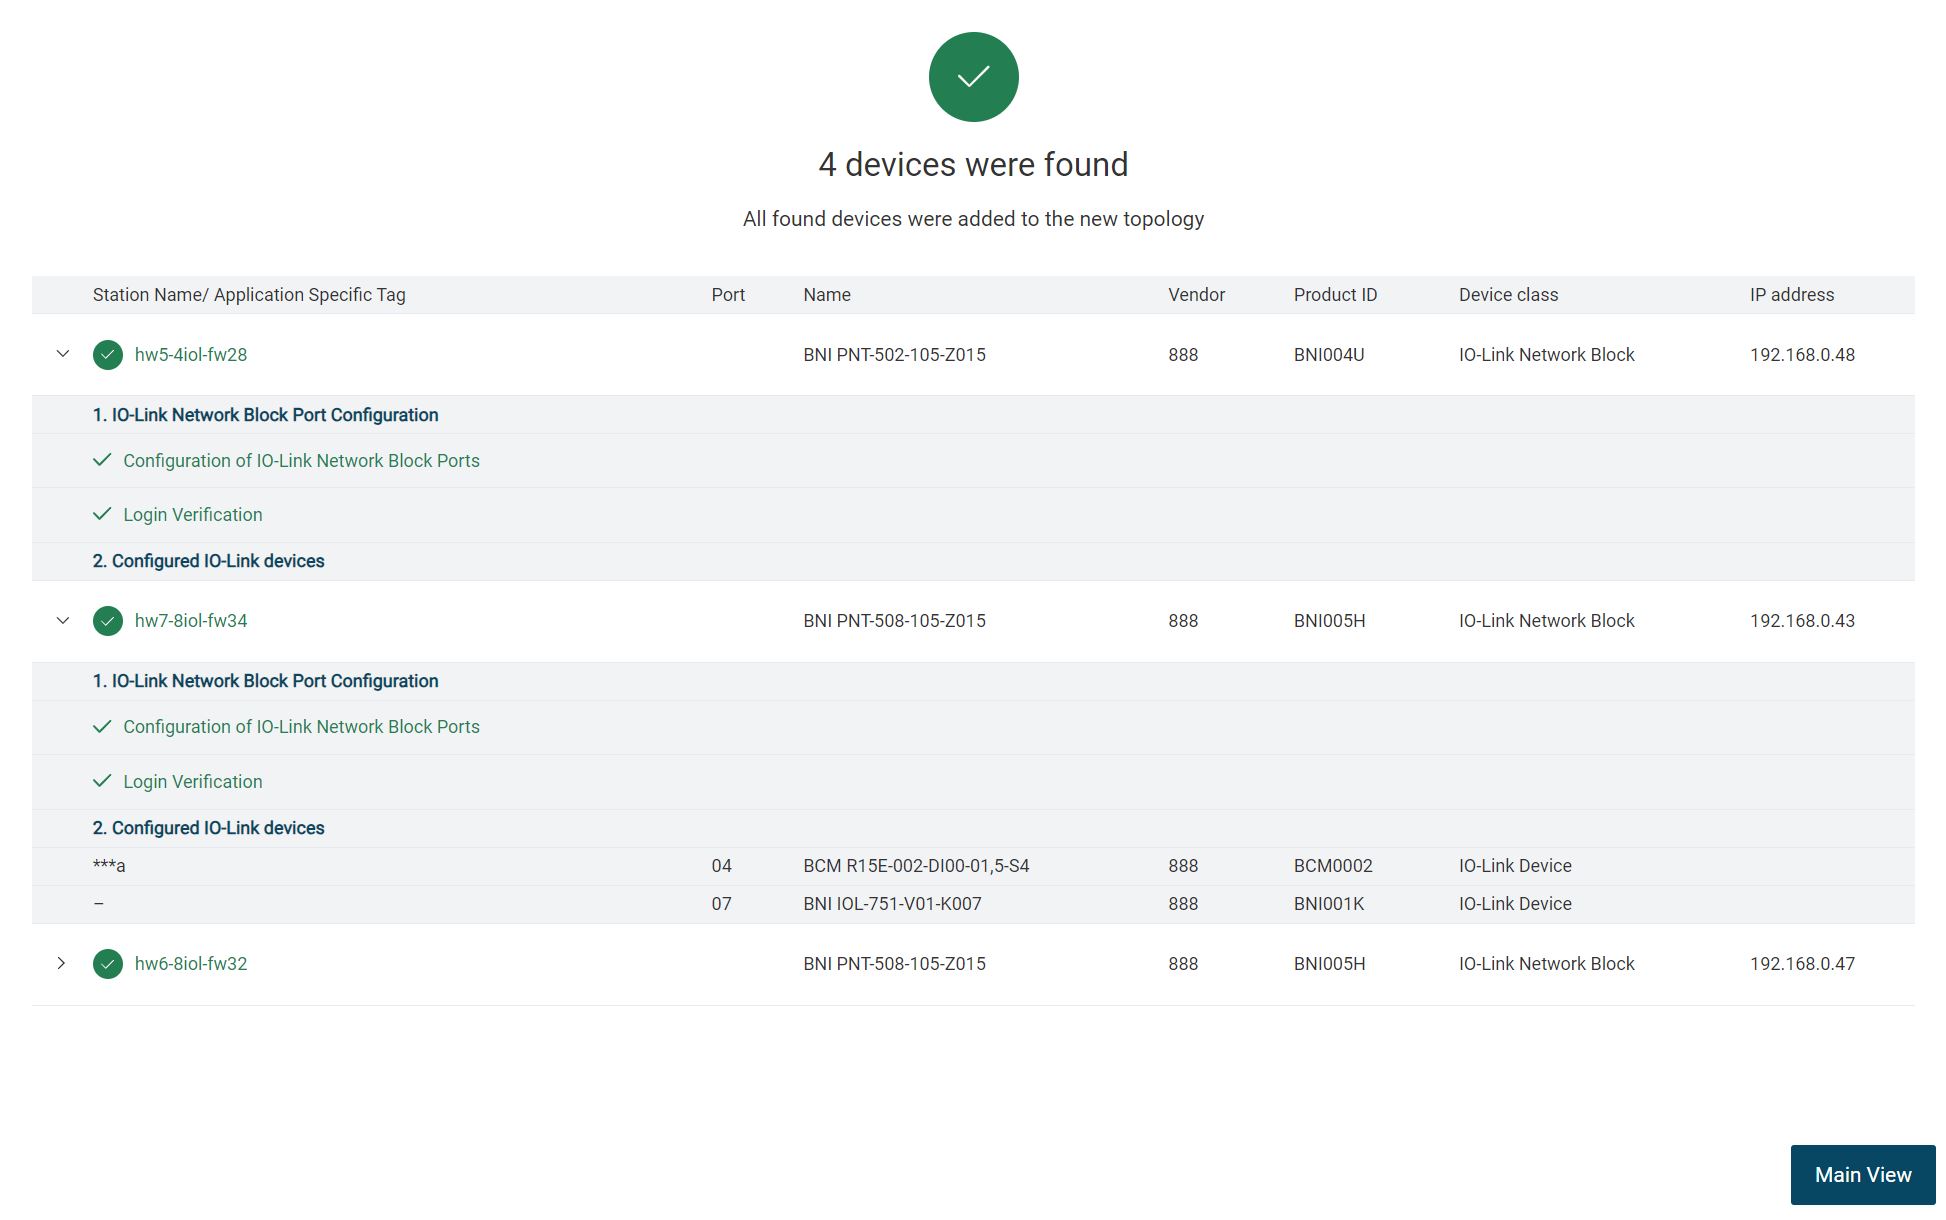
To apply the topology, click MINIMUM VIEW.
Check SSL certificate for HTTPS connection (HTTPS certificate error)
If an IO-Link network module has changed its SSL key or the SSL certificate is not trustworthy when communicating via HTTPS, you must explicitly classify the IO-Link device as trustworthy.
Click ETHERNET/IP SEARCH to search for IO-Link devices on the EtherNet/IP bus.
The following warning appears:
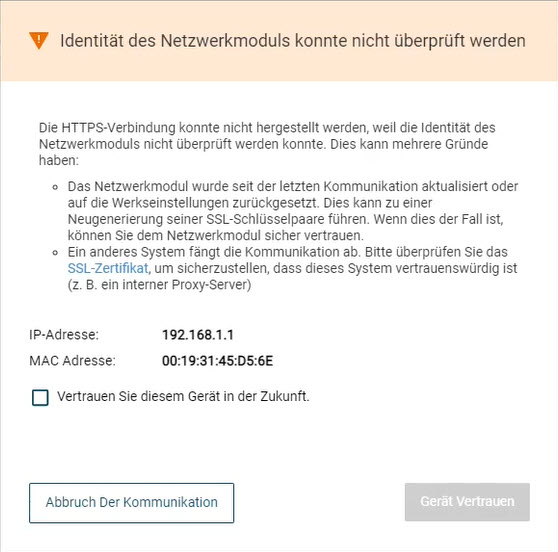
To view details of the SSL certificate, click on the link SSL certificate in the information text.
The certificate details are displayed:
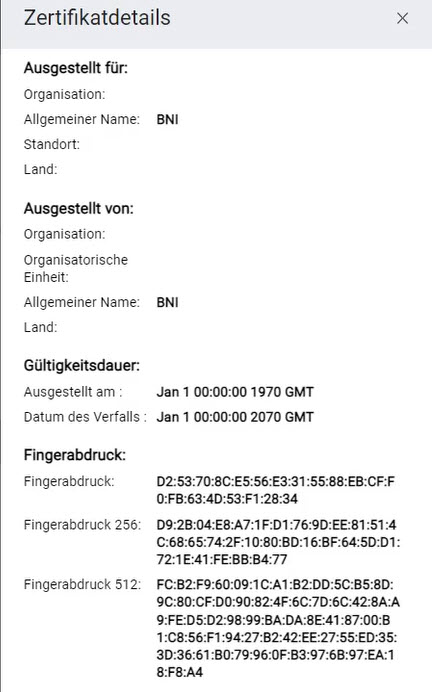
You can cancel the communication or trust the device. To cancel communication, click CANCEL COMMUNICATION. To trust the device, activate the checkbox Trust this device in the future.
The TRUST DEVICE button is activated.
Click on TRUST DEVICE.
The device is classified as trustworthy and can be used.
Fix invalid SSL certificate for HTTPS connection
If the SSL certificate for BET is not recognized as trustworthy, you have two options:
You restart the BET .
You contact the support team.
Click ETHERNET/IP SEARCH to search for IO-Link devices on the EtherNet/IP bus.
The following warning appears:
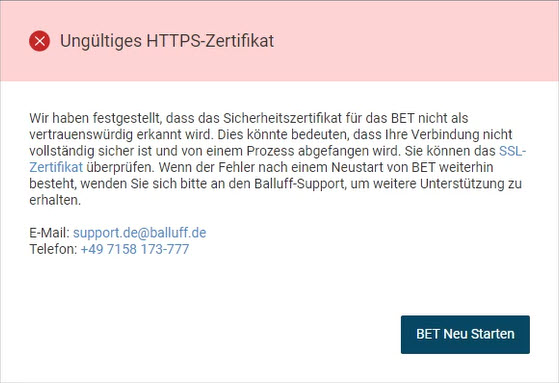
To view details of the SSL certificate, click on the link SSL certificate in the information text.
The certificate details are displayed:

Click RESTART BET. If the error still occurs, please contact Balluff support.